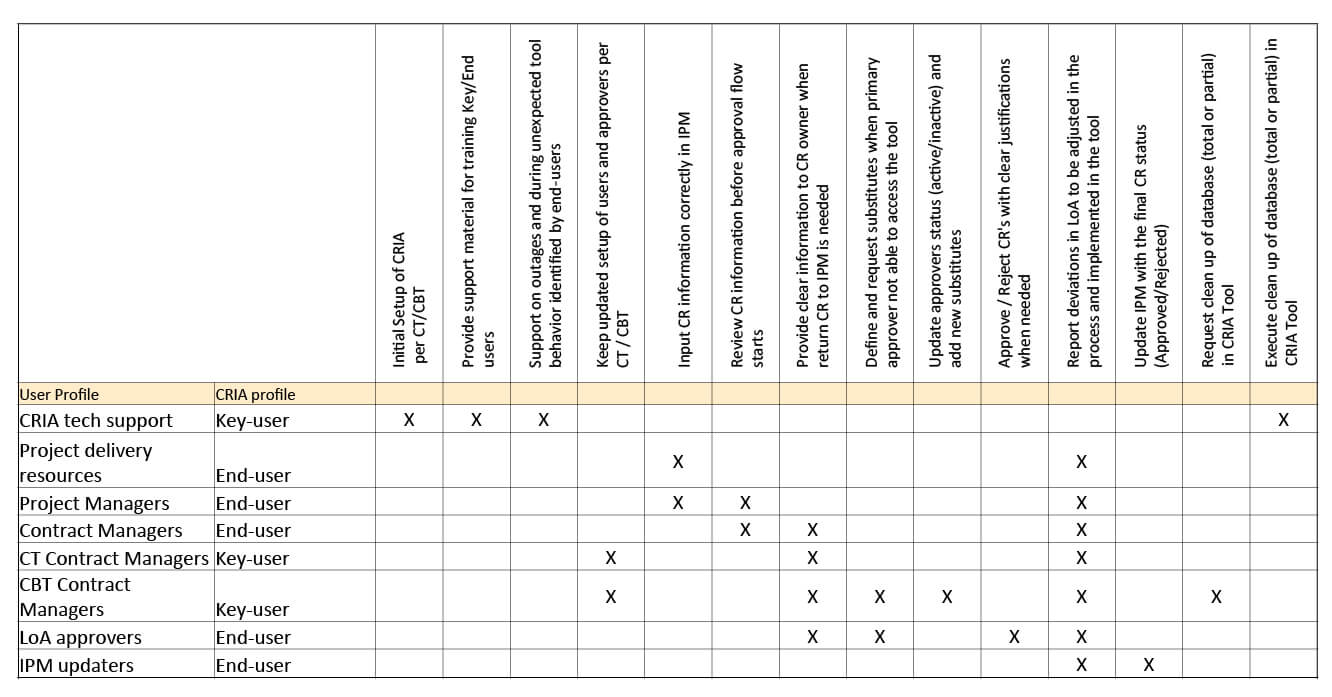
ZINA: Key user CRIA
by ZINATeamZINA Workflow Management: CRIA - Key user for launch

CR workflow using IPM and CRIA.
• CRIA stands for Change Request Innovative Automation. It’s a tool developed by Business Operations team for Latin America.
• CRIA tool aims to allow automation in the approval chain for Change Requests and centralize the database with information associated with these CRs.
• CRIA acts in the process of Change Requests approval. It is still needed and mandatory the usage of IPM for all other processes associated with CRs.
• This document describes the operational procedures for end users to import CR data from IPM and the benefits of the CRIA tool usage.


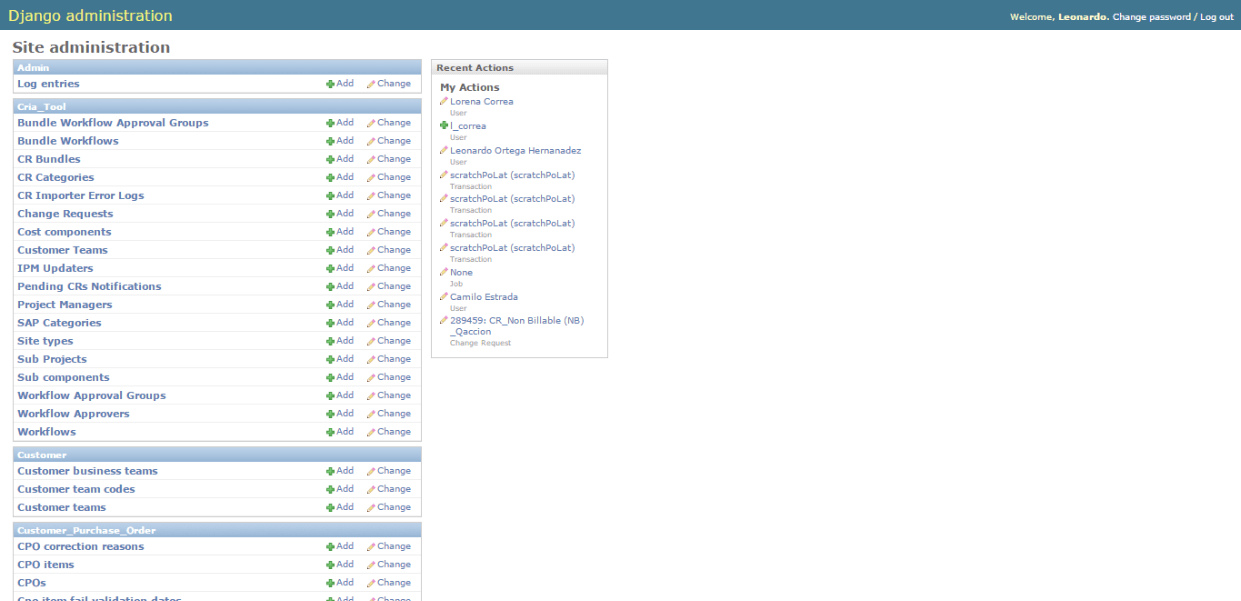
Access to ZINA Workflow management admin from NSN INTRA by typing http://zina.net.nokia.com/admin/ in your browser' search bar.
1. On the left side, under Change Request menu, the Key user will have access to some configurations submenus for CRIA Tool.
2. On the right side a summary of the user last actions.
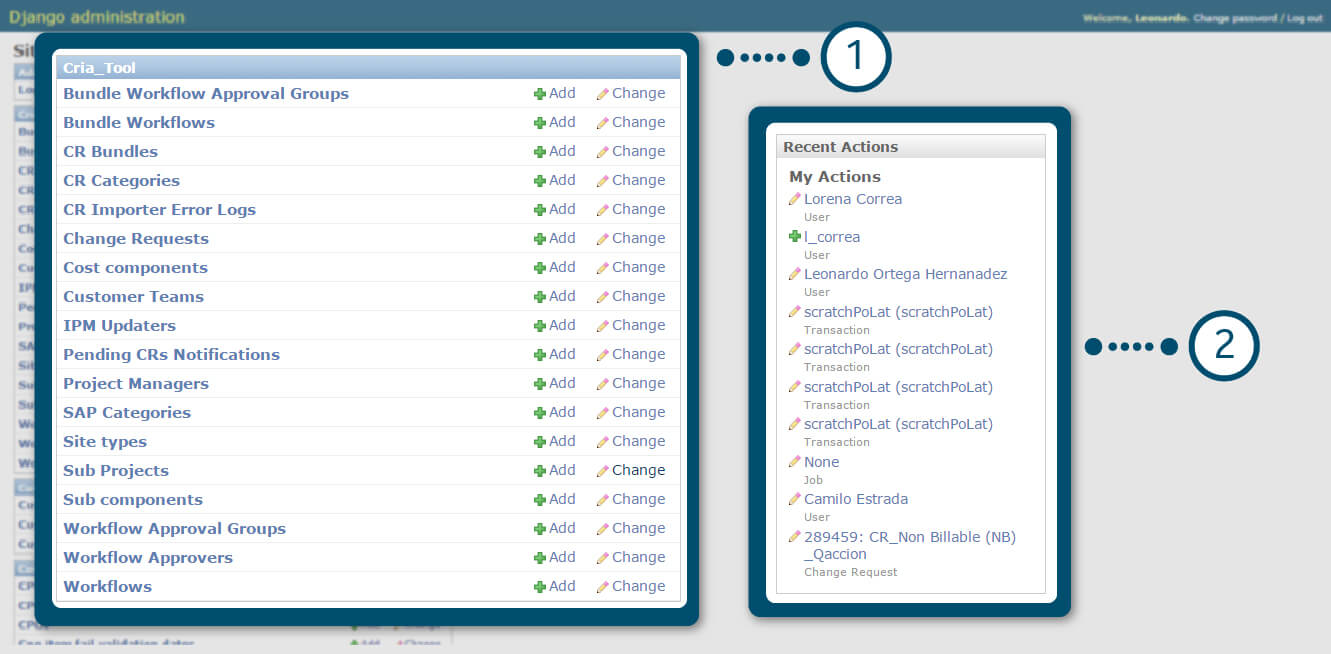
CRIA – Configure a Customer Team
1. In CRIA Tool administration menu.
2. Click on “Customer Team” link.
Important: Customer teams are imported from IPM, with the names available in IPM. In CRIA we will just setup configuration allowed for a specific customer team.
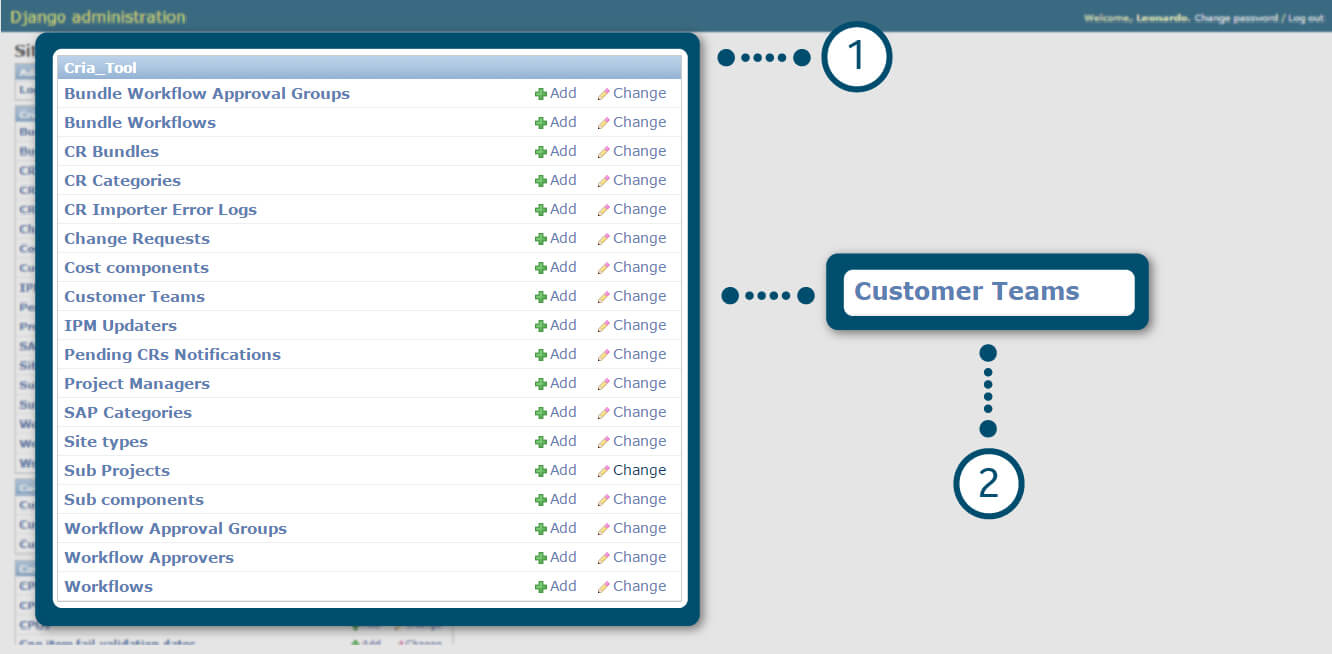
CRIA – Configure a Customer Team
1. You can search for a CT name. The list of all available CT has updated automatically. If your CT is not in the list, please contact technical support.
2. You can click on an existent CT to modify its definitions.
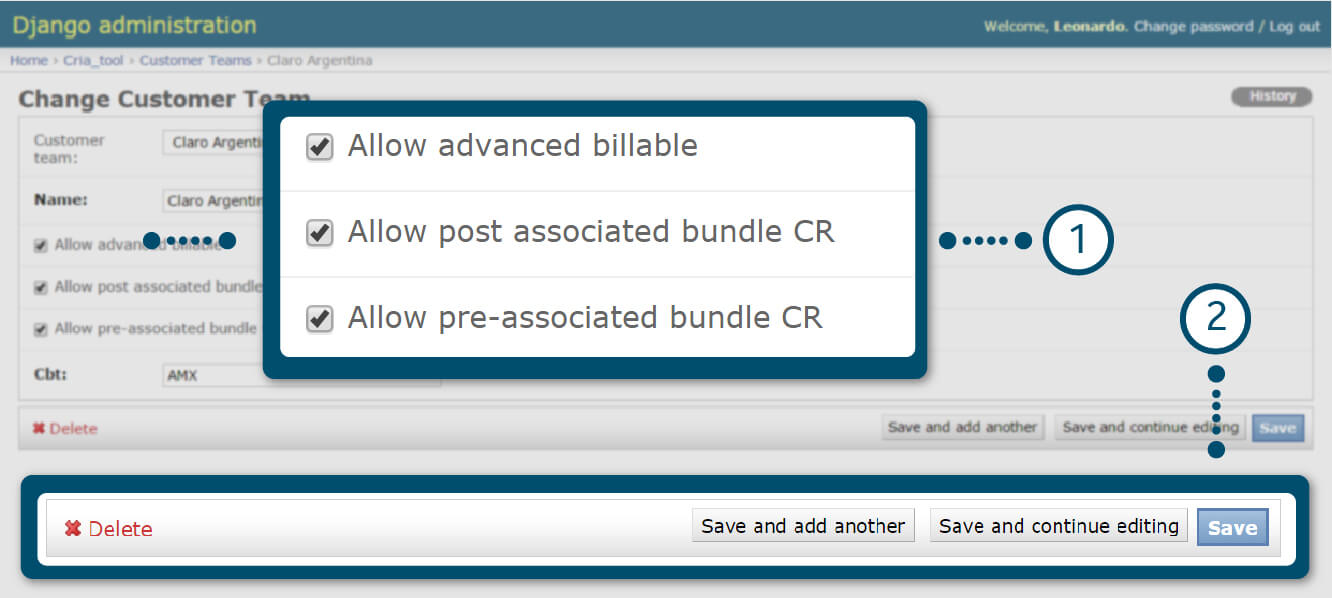
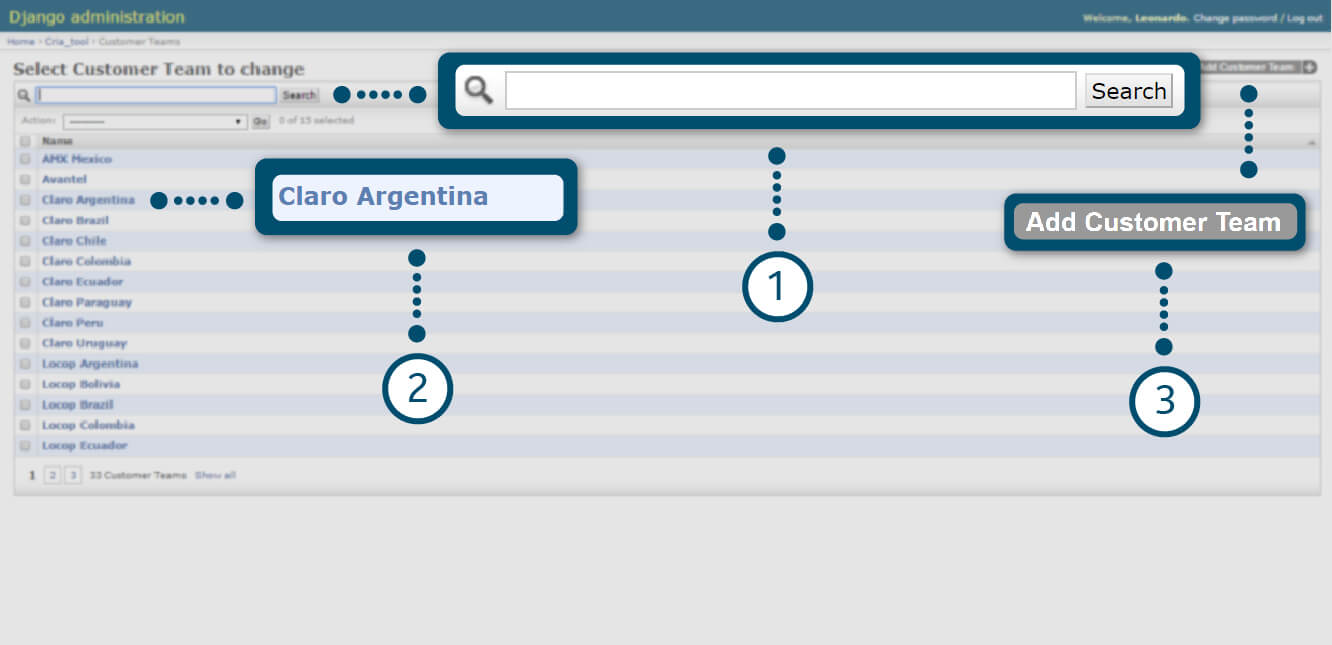
CRIA – Configure a Customer Team
Once you selected a CT:
1. Check the box for allowing “Advanced Billable” CR type in your CT (AMX Chile only, at this moment). Or Check the boxes to allow “pre-associated” (TIM Brazil only) or “post-associated bundle CR” (AMX Chile only) in your CT (definition of pre and post will be in bundle session).
2. Choose the best alternative for saving.
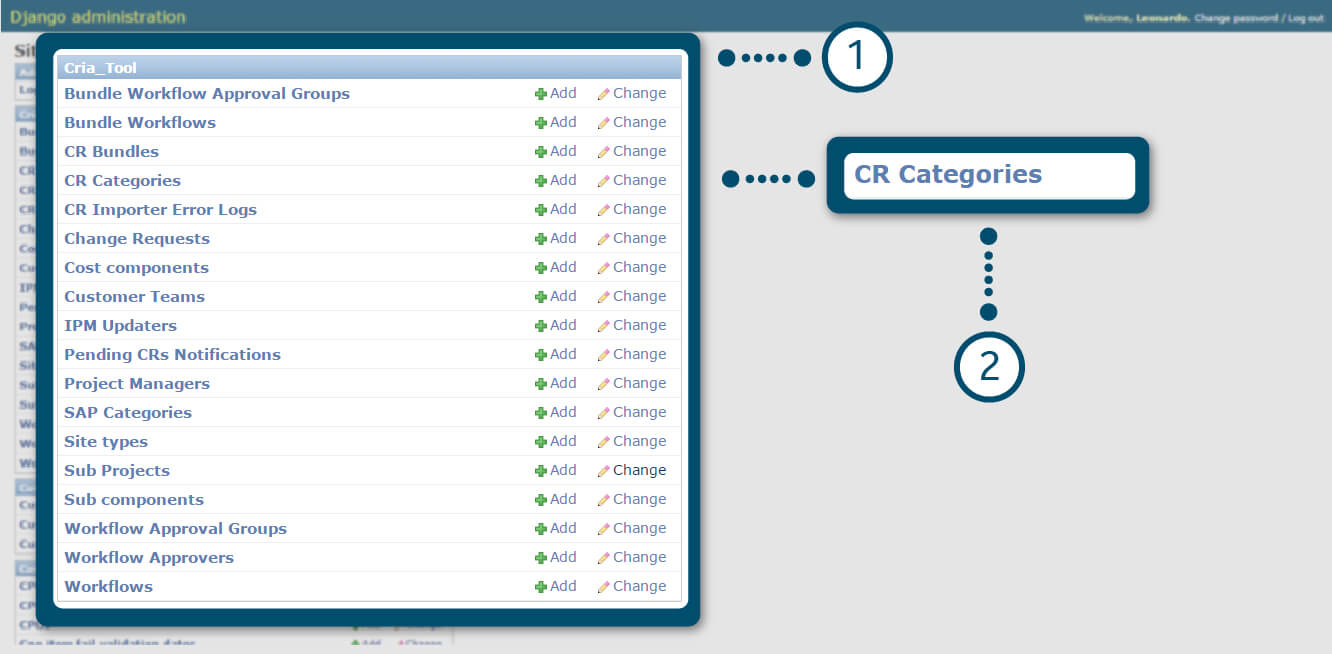
CRIA – Create a new CR Category
1. In CRIA Tool administration menu.
2. Click on “CR Categories” or on the respective “add/change” links.
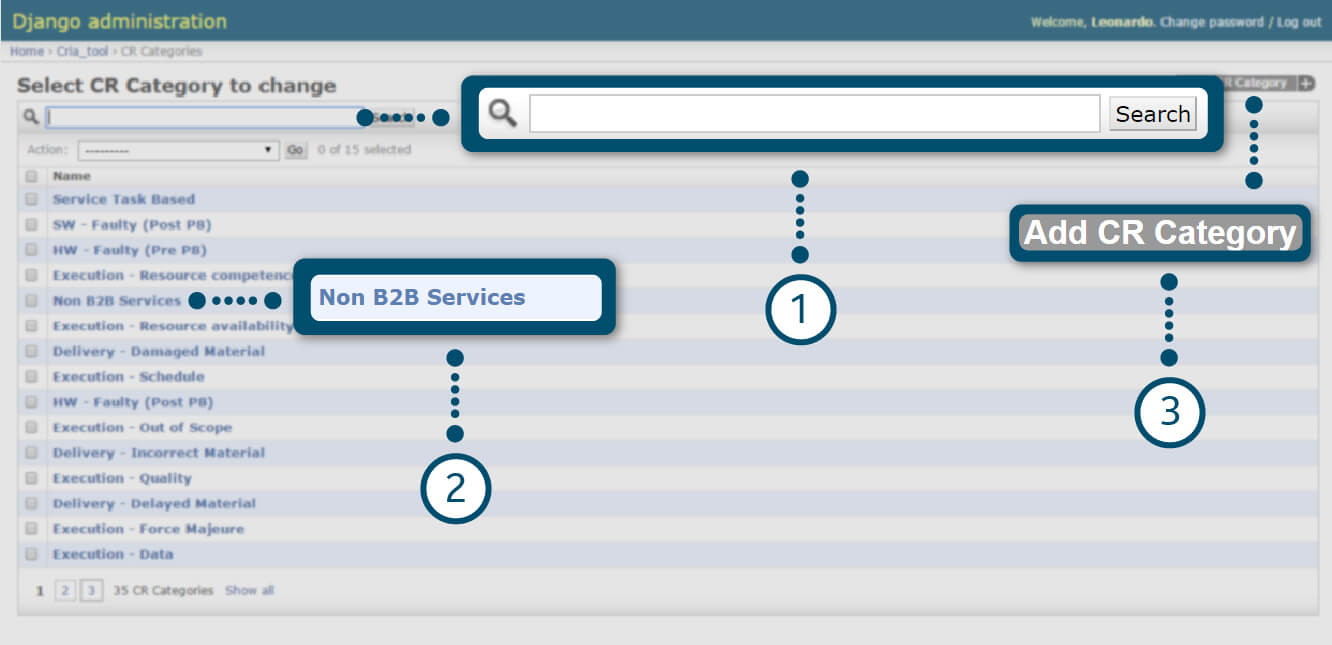
CRIA – Create a new CR Category
1. You can search for a CR Category. The list of all available CT has updated automatically.
2. Click on existent CR Category to modify its definitions.
3. Click on “Add CR Category” to add new.
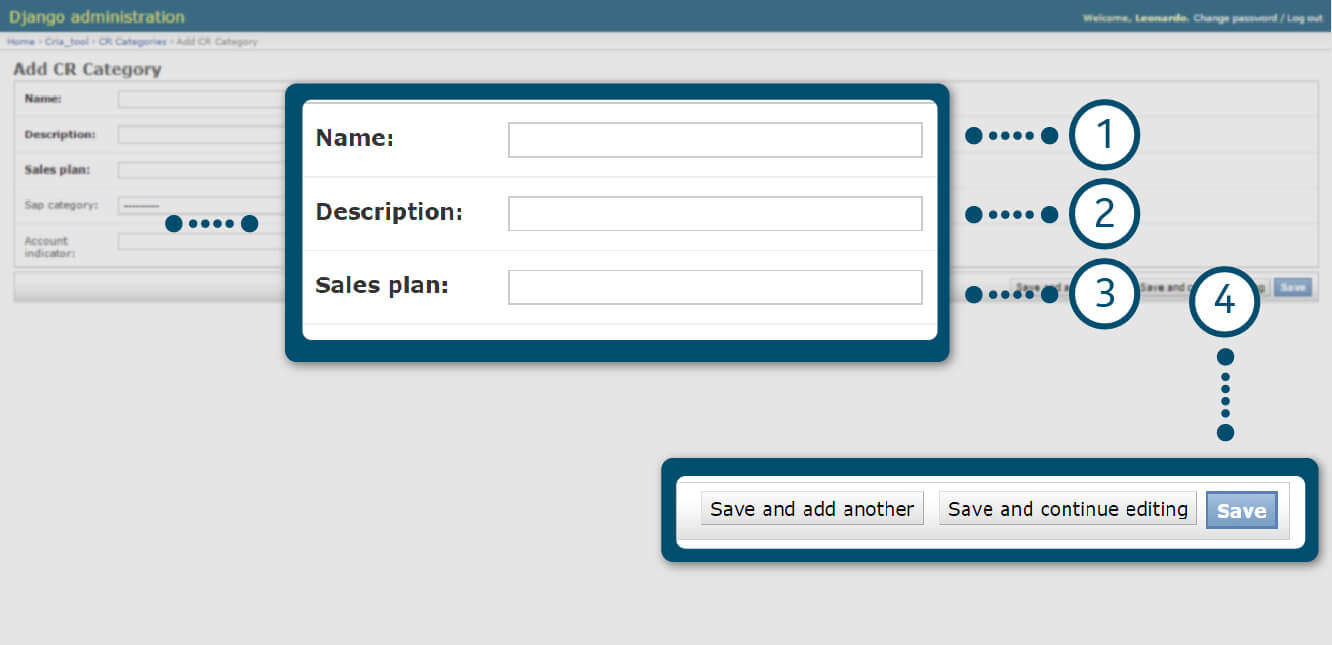
CRIA – Create a new CR Category
1. Define Name for CR Category.
2. Provide a short description of the CR Category. (it will appear on CRIA User area)
3. The sales plan is just a logical conclusion of “billable” or “nonbillable” based on field 2, but it’s not linked to any other field in the CRIA user area.
4. Choose the best alternative for saving.
CR Category names should be 100% aligned with names used and valid in IPM.
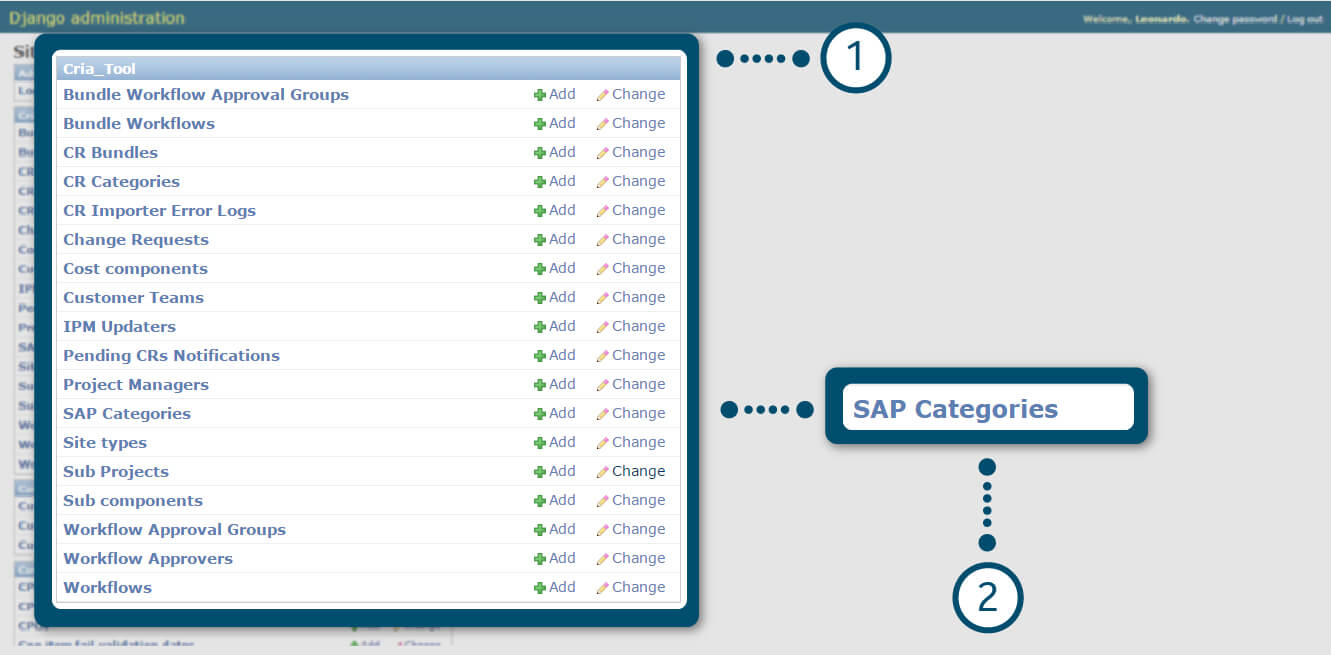
CRIA – Create a new CR SAP Category
1. In CRIA Tool administration menu.
2. Click on “SAP Category” link.
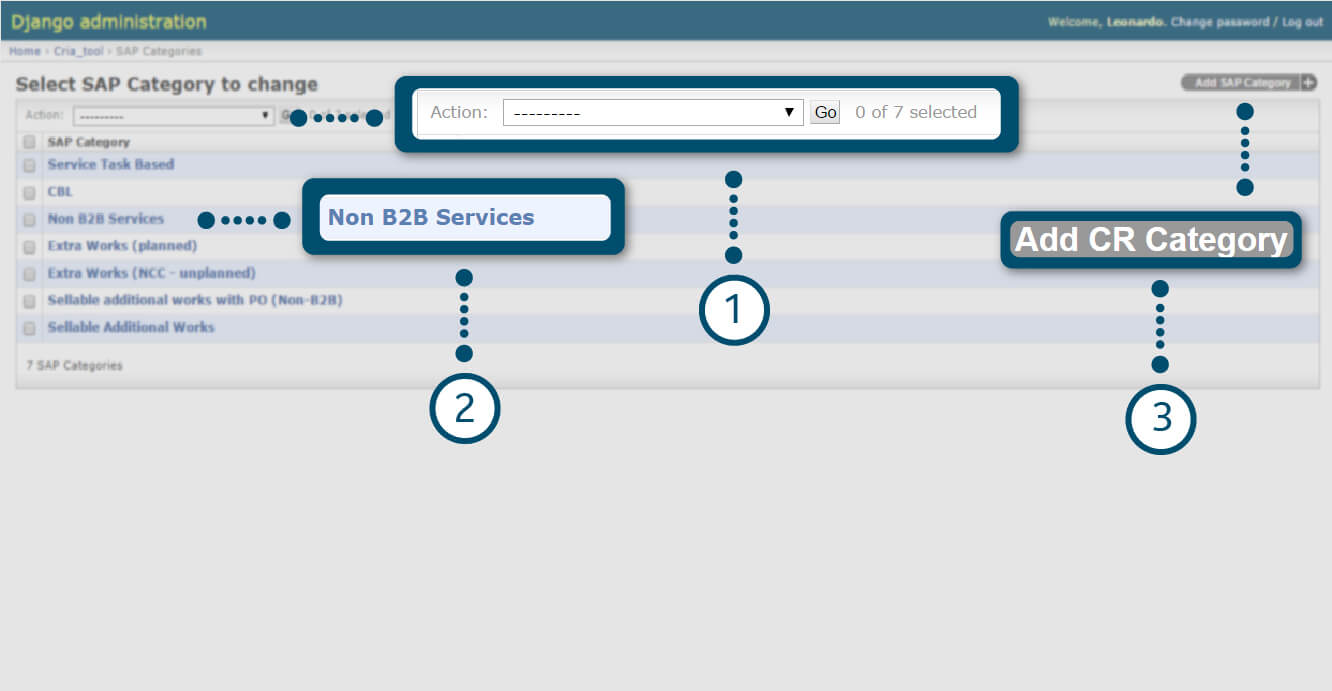
CRIA – Create a new CR SAP Category
1. You can search for a SAP Category. The list of all available CT has updated automatically.
2. Click on existent CR SAP Category to modify its definitions.
3. Click on “Add SAP Category” to add new.
CR SAP Category names should be 100% aligned with names used and valid in IPM.
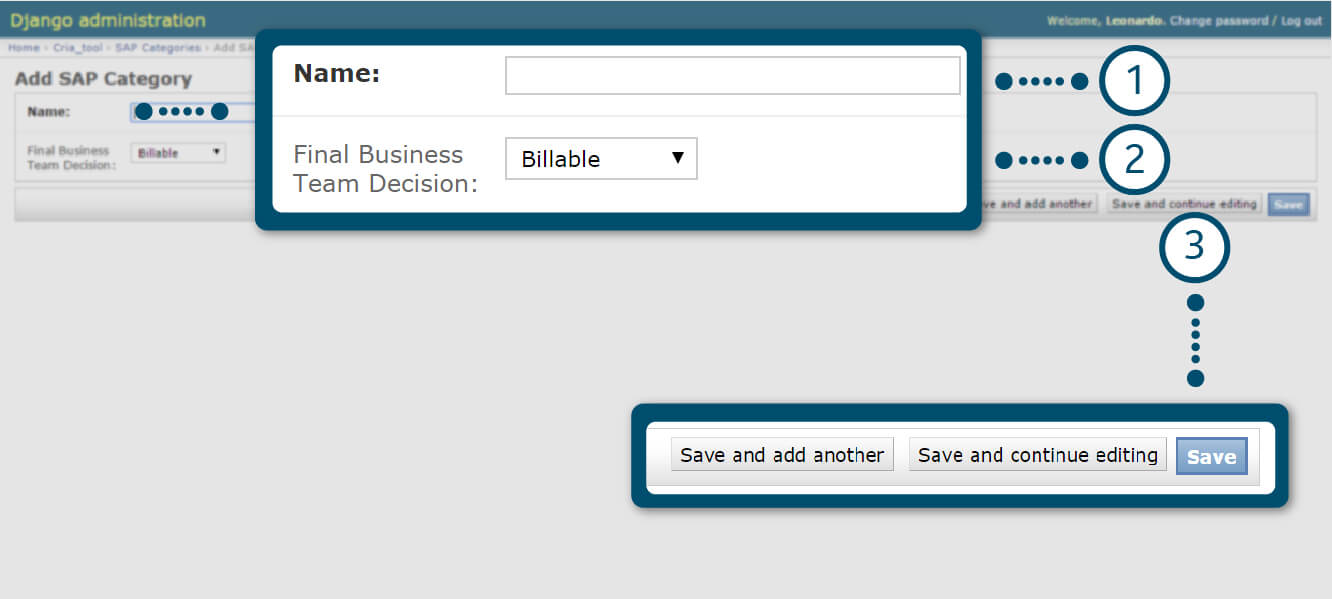
CRIA – Create a new CR SAP Category
1. Insert SAP Category name (current categories available in IPM already included in CRIA)
2. Associate Billability logical decision.
3. Choose the best alternative for saving.

CRIA – Create a new Project Manager
1. In CRIA Tool administration menu.
2. Click on “Project Managers” link.
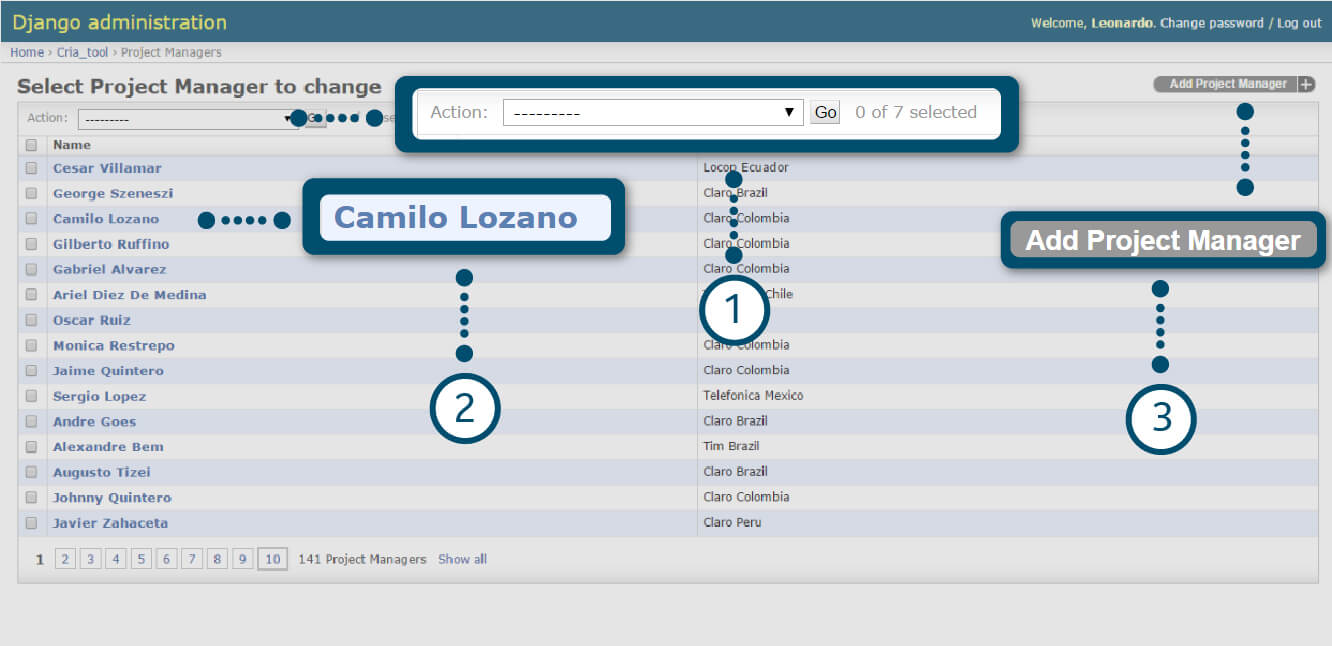
CRIA – Create a new Project Manager
1. You can delete any Project Manager with the “Action” option.
2. Click on an existent name to modify its fields.
3. Click on “Add Project manager” to add a new one.

CRIA – Create a new Project Manager
1. You should enter Zina User ID, or click on the search icon to look for a name.
2. The tool will provide the list with all available customer teams to which the PM can be associated. Pick up from left side list items and include them in the right side list.
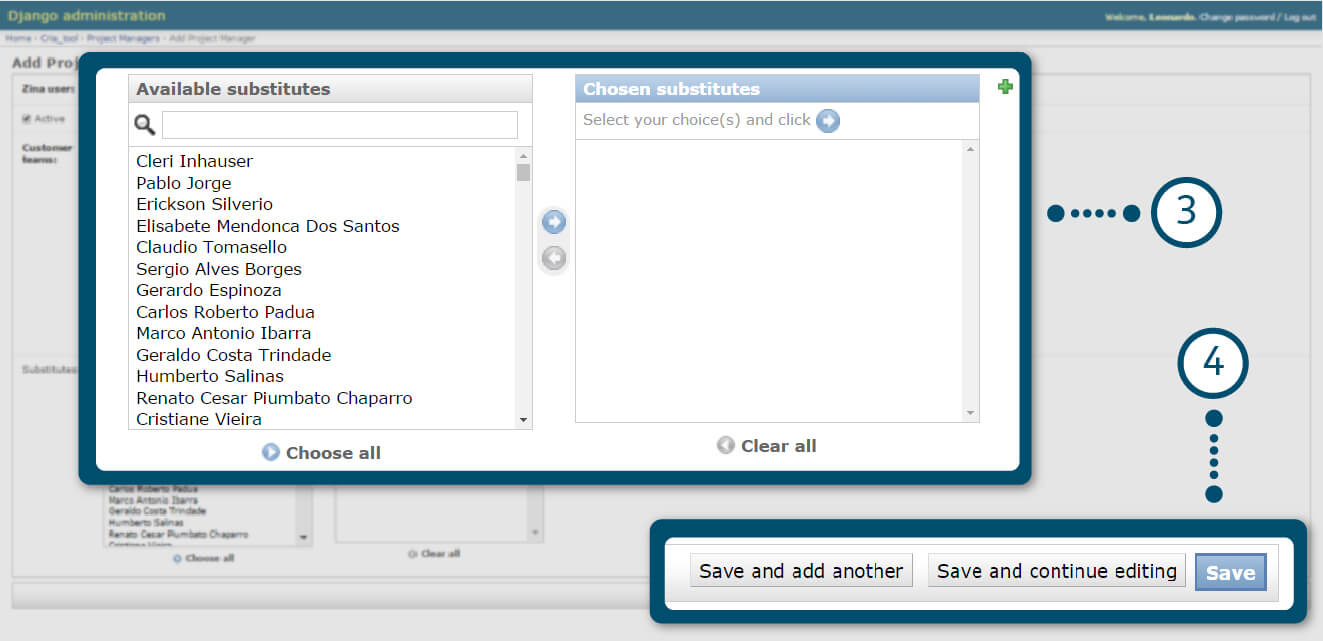
CRIA – Create a new Project Manager
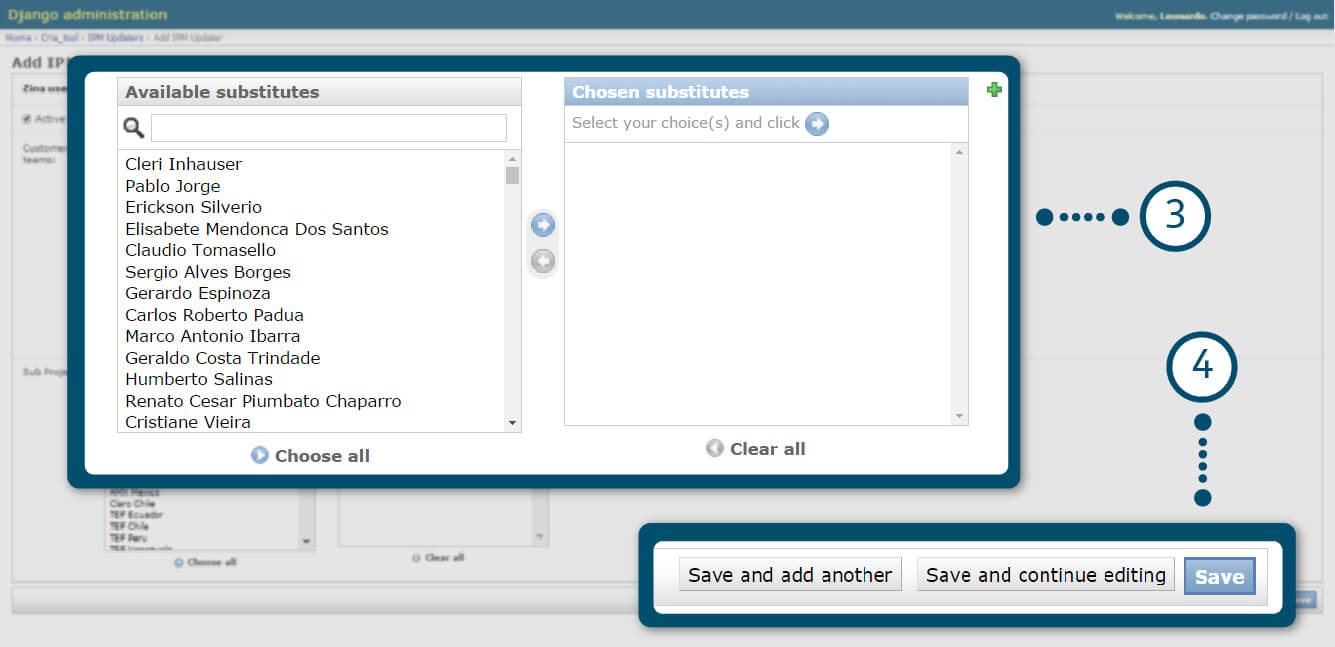
3. For each person defined in 1 and 2, you can select a substitute.
4. Choose the best alternative for saving.
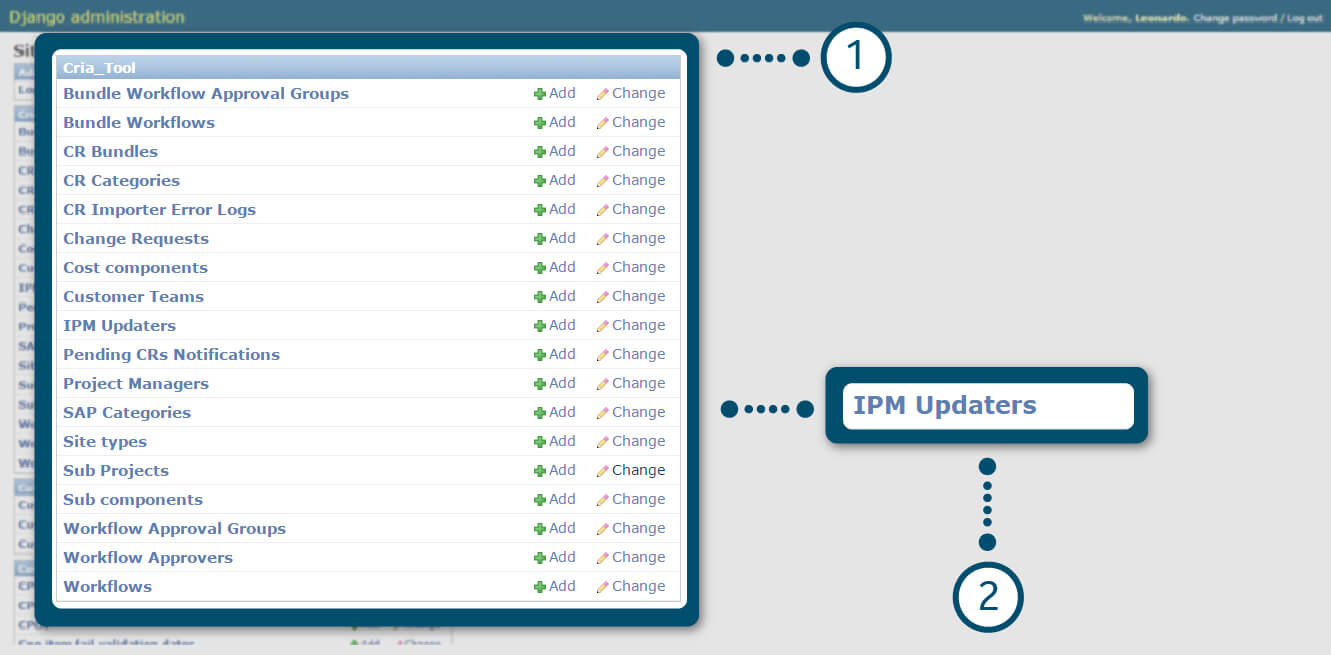
CRIA – Create a new IPM “updater”
1. In CRIA Tool administration menu.
2. Click on “IPM Updaters” link.
Important: This procedure will allow the definition of the person who will receive a notification after CR is approved. This person is responsible for updating IPM with approval information.
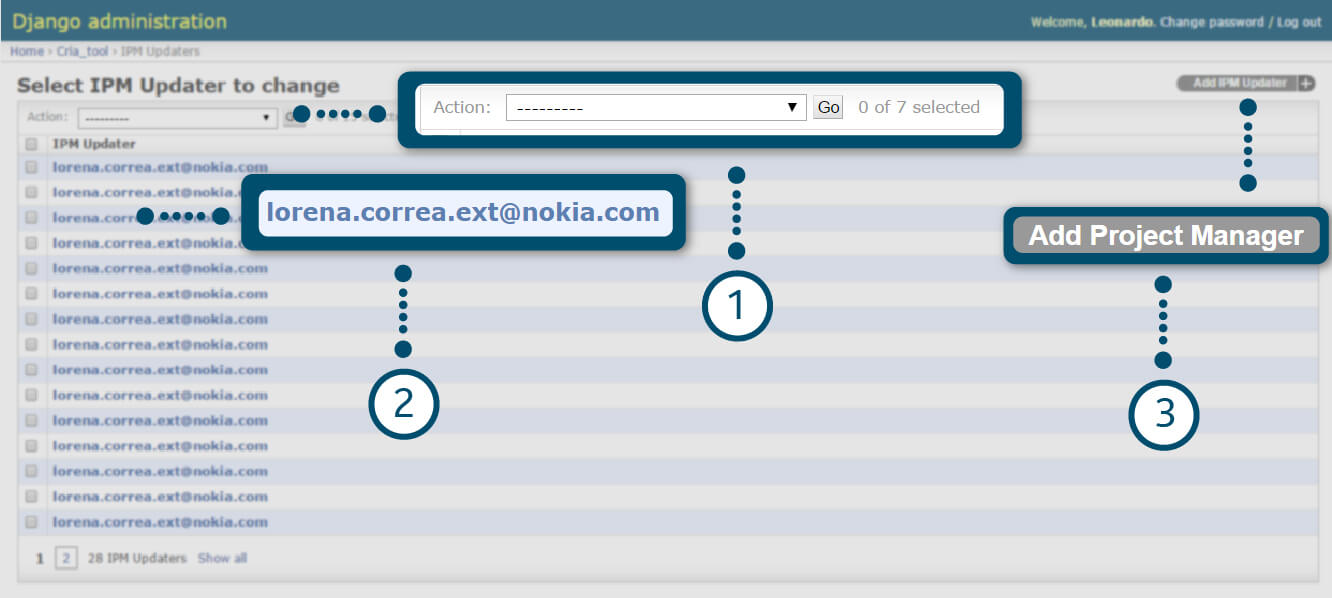
CRIA – Create a new IPM “updater”
1. You can delete any IPM update with the “Action” option.
2. You can Click on an existent name to modify its definitions.
3. Click on “Add IPM Updater” to add a new.
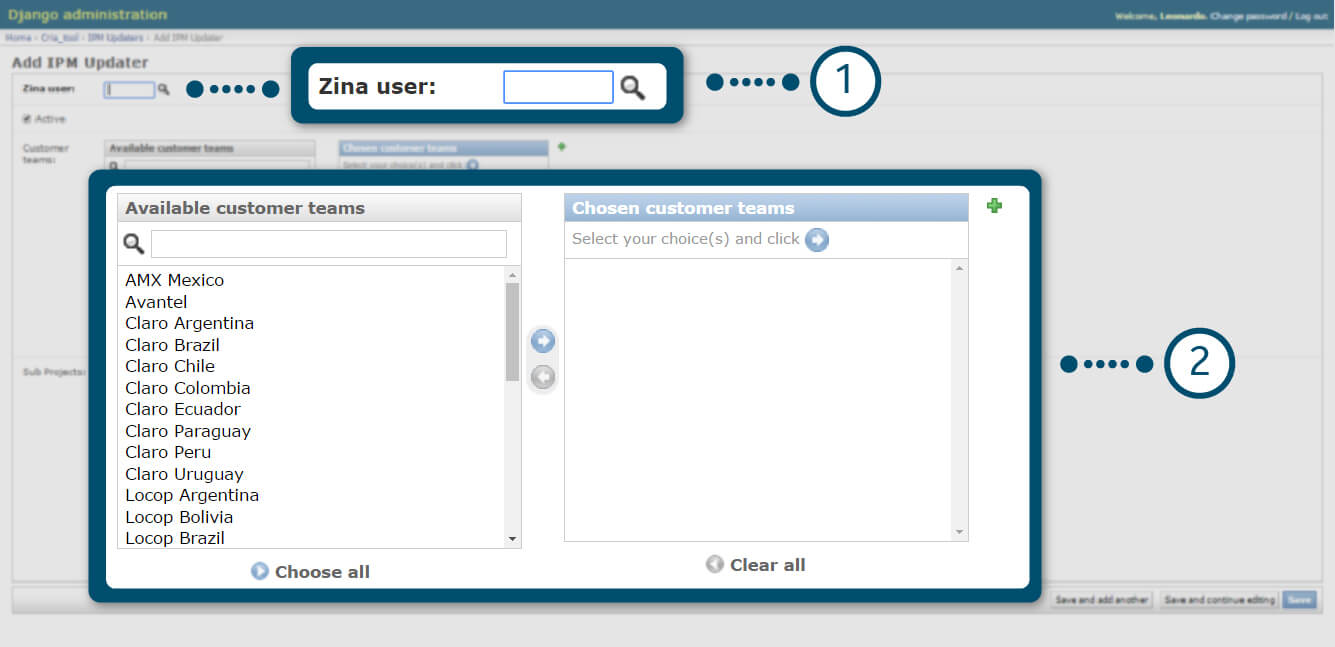
CRIA – Create a new IPM “updater”
1. Provide a valid Zina user.
2. Pick up the customer teams that the person will have rights to access.Select the sub-projects that the user will have access.
CRIA – Create a new IPM “updater”
3. Select the sub-projects that the user will have access.
4. Choose the best alternative for saving.

CRIA – Create a new Sub-Project
1. In CRIA Tool administration menu.
2. Click on “Sub-Projects” link.
Important: Creating a sub-project is a functionality in CRIA to improve the controls and financial disclosure that other tool did not allow before. It’s up to the CT Key User to set up different sub-projects (according to the need) or just keep one “dummy” sub-project set up.
CRIA – Create a new Sub-Project
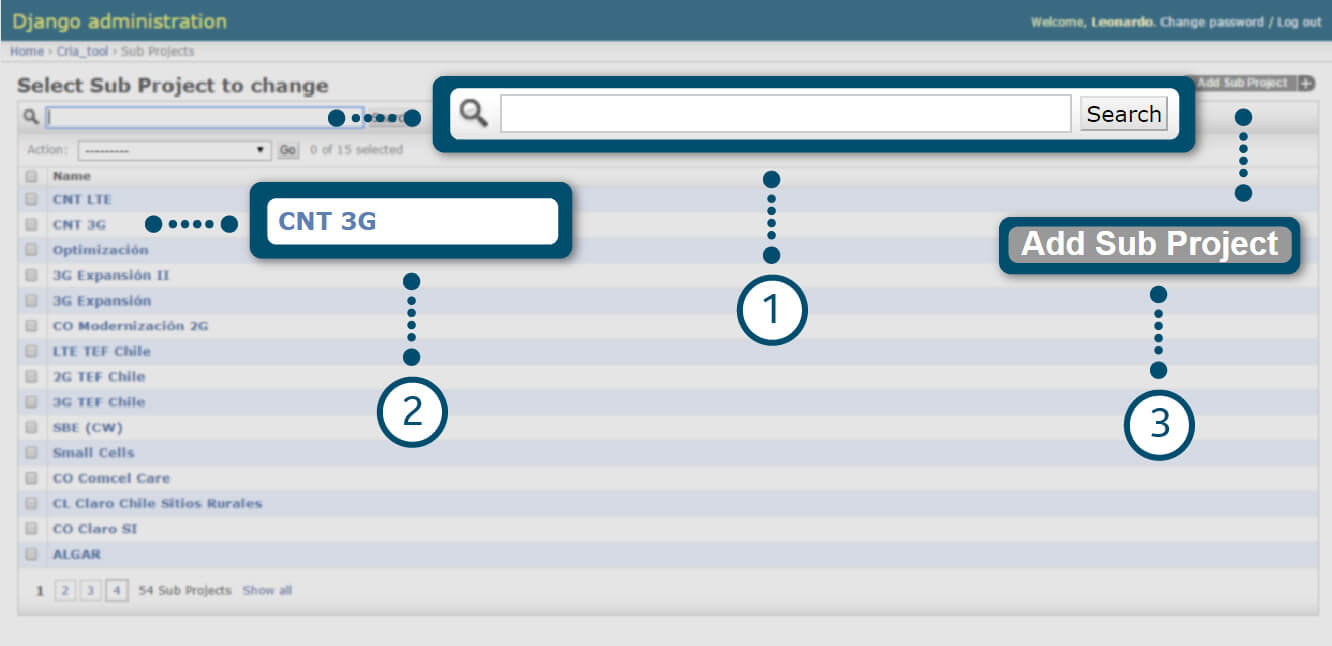
1. You can search for a Sub-Project. The list of all available CT has updated automatically.
2. Click on an existent name to modify its fields.
3. Click on “Add Sub-Project” to add a new.
CRIA – Create a new Sub-Project
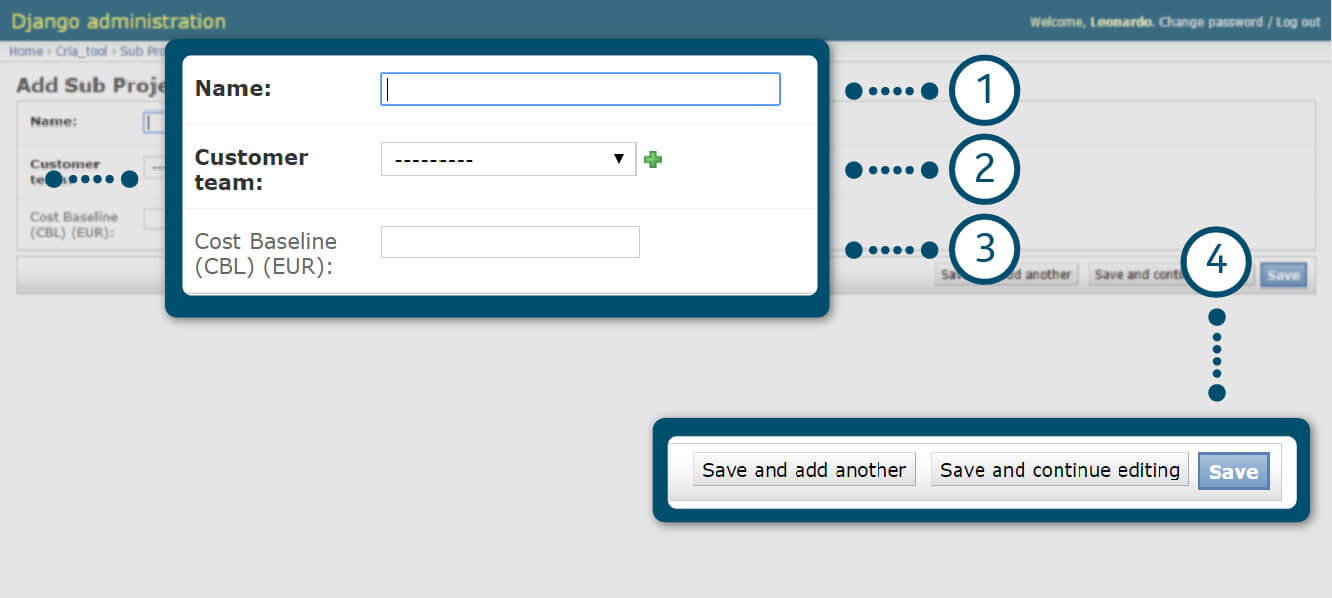
1. Insert sub-project name.
2. Define Customer team. (available in the predefined list)
3. Insert Cost Baseline in Euros (if available for the specific WBS). This field is OPTIONAL.
4. Choose the best alternative for saving.
Subproject will be selectable by end user only when there are 2 or more in a CT.
CRIA – Create a new Approval Group
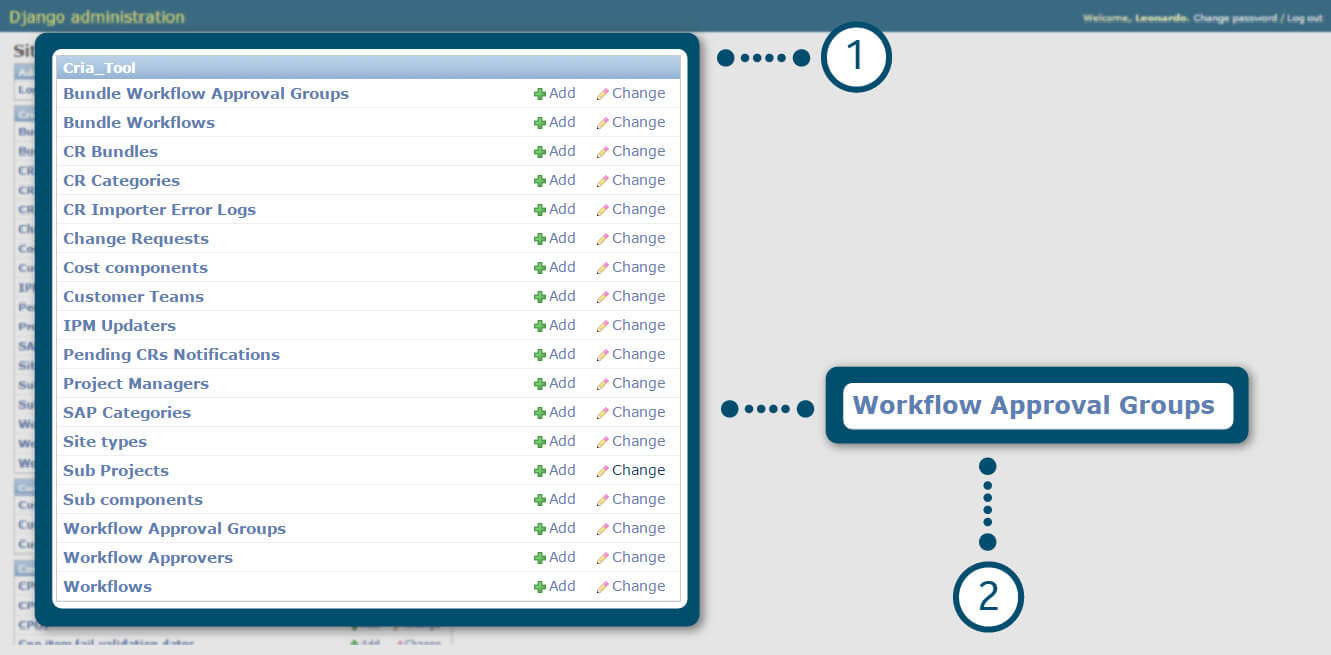
1. In CRIA Tool administration menu.
2. Click on “Workflow Approval Groups” link.
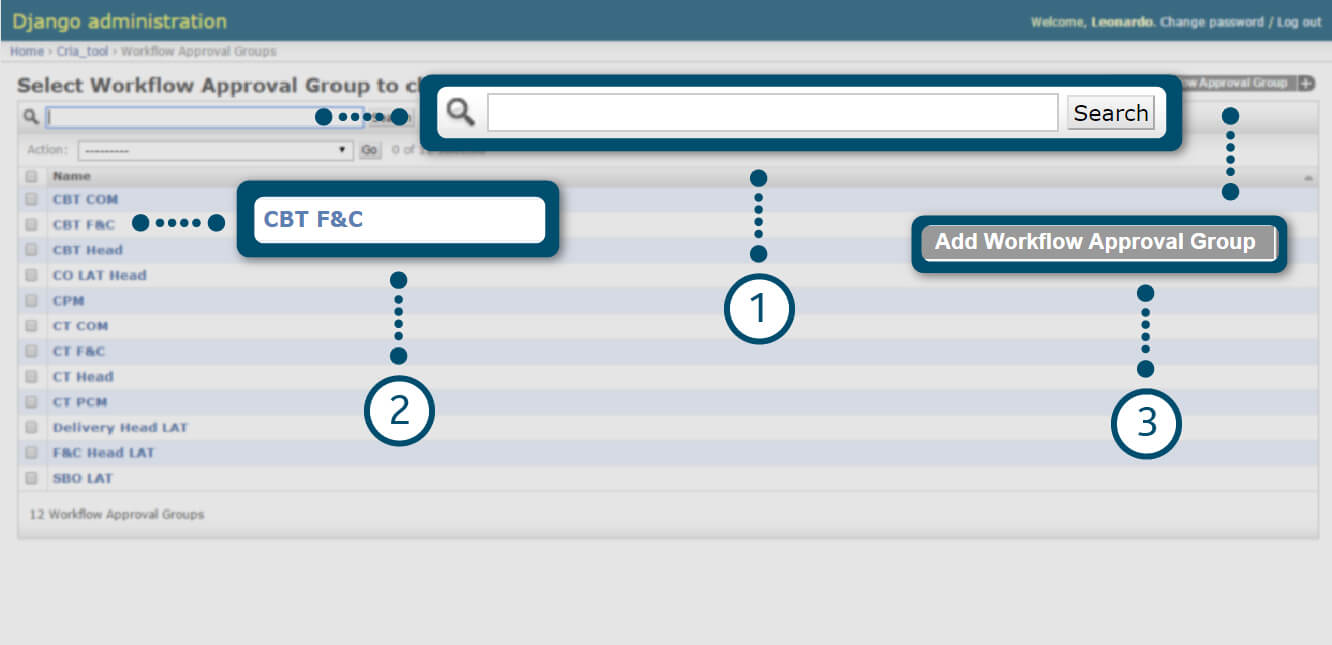
CRIA – Create a new Approval Group
1. You can search for a Sub-Project. The list of all available CT has updated automatically.
2. Click on an existent name to modify its fields.
3. Click on “Add Workflow Approval Group” to create a new.
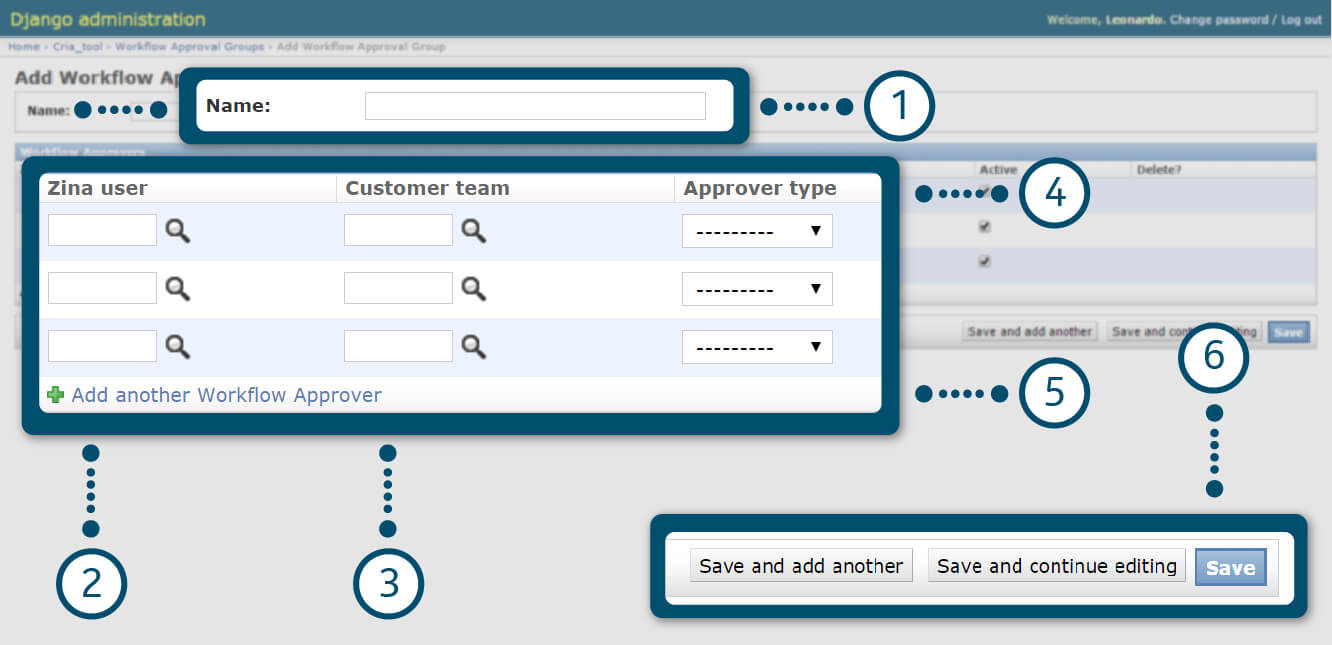
CRIA – Create a new Approval Group
1. Insert name for a new group.
2. Insert Zina user ID or use the search engine to find a user.
3. Define Customer Team. ( it’s a number that refers to a CT in the predefined list)
4. Approved type can be: Primary (just one) or Substitute (as many as needed)
5. Add a new line to define a new approver.
6. Choose the best alternative for saving.
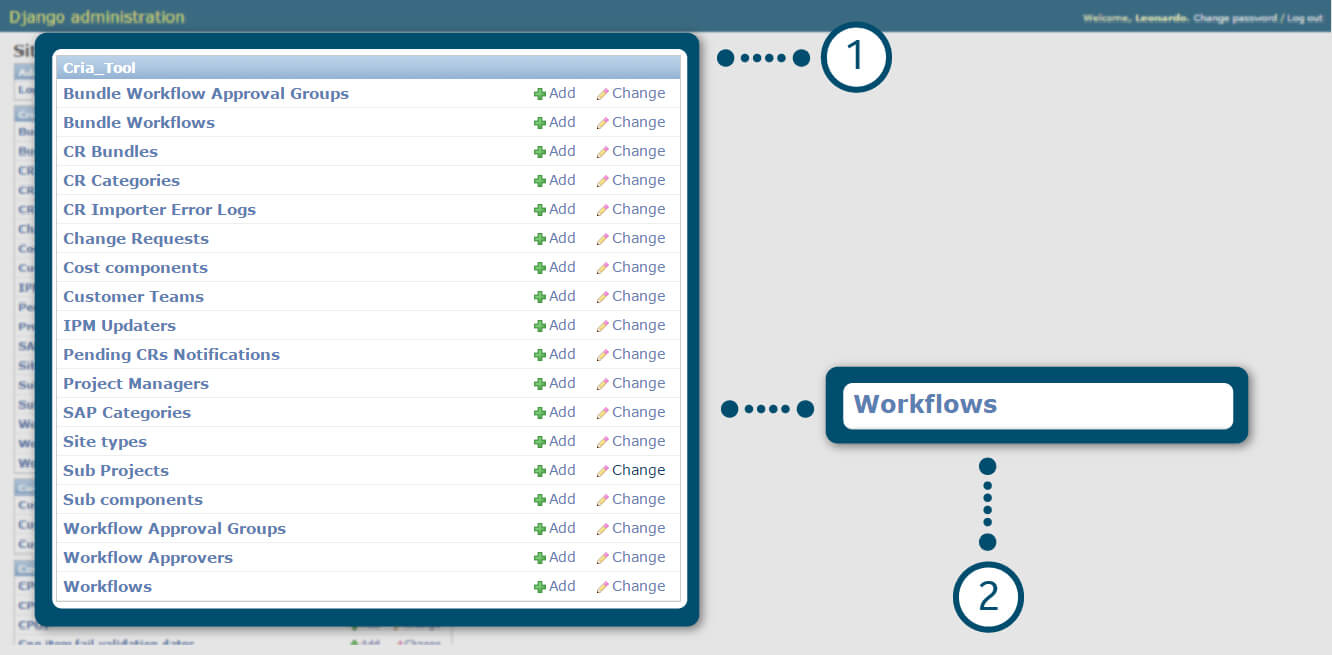
CRIA – Create a new Workflow
1. In CRIA Tool administration menu.
2. Click on “Workflow” link.
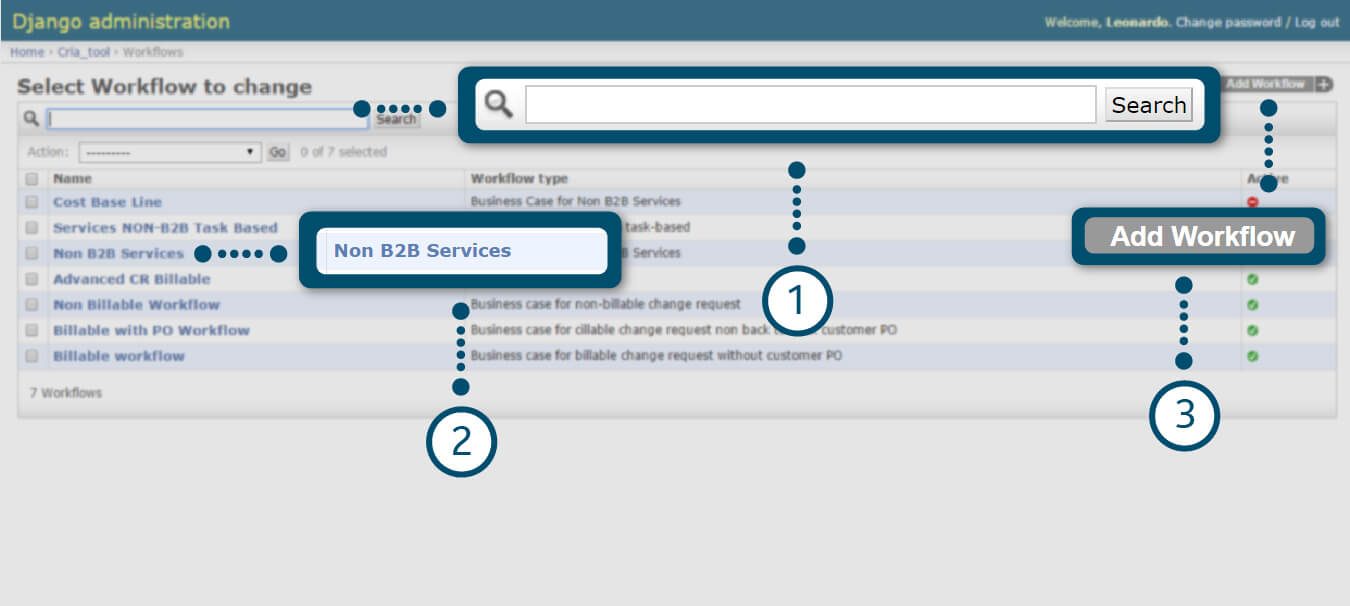
CRIA – Create a new Workflow
1. You can search for a workflow.
2. You can click on an existent group to modify its definitions.
3. Click on “Add Workflow” to create a new.

CRIA – Create a new Workflow
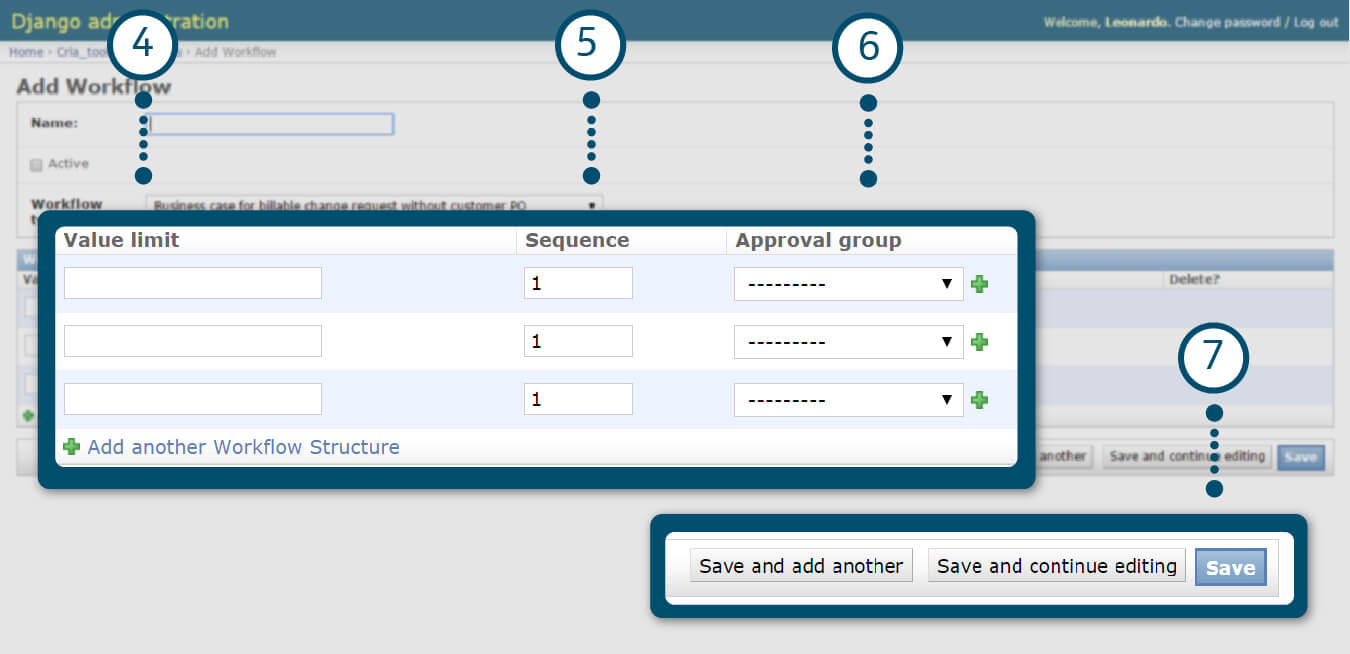
1. Define a name for a new workflow.
2. There are 4 types of workflows (associated with the 4 types of business cases) currently available.
3. It is possible to make just one active workflow for each type. However, it’s possible to plan new workflows and leave them inactive in the tool.
CRIA – Create a new Workflow
4. The next approval level must be defined in this field.
5. In “Value limit” it is defined the minimum amount in Euros that this level of approval will be assigned to approve.
6. In “Sequence” index it is defined the relative position of the approval group inside the whole approval chain.
7. Select the best alternative for saving.
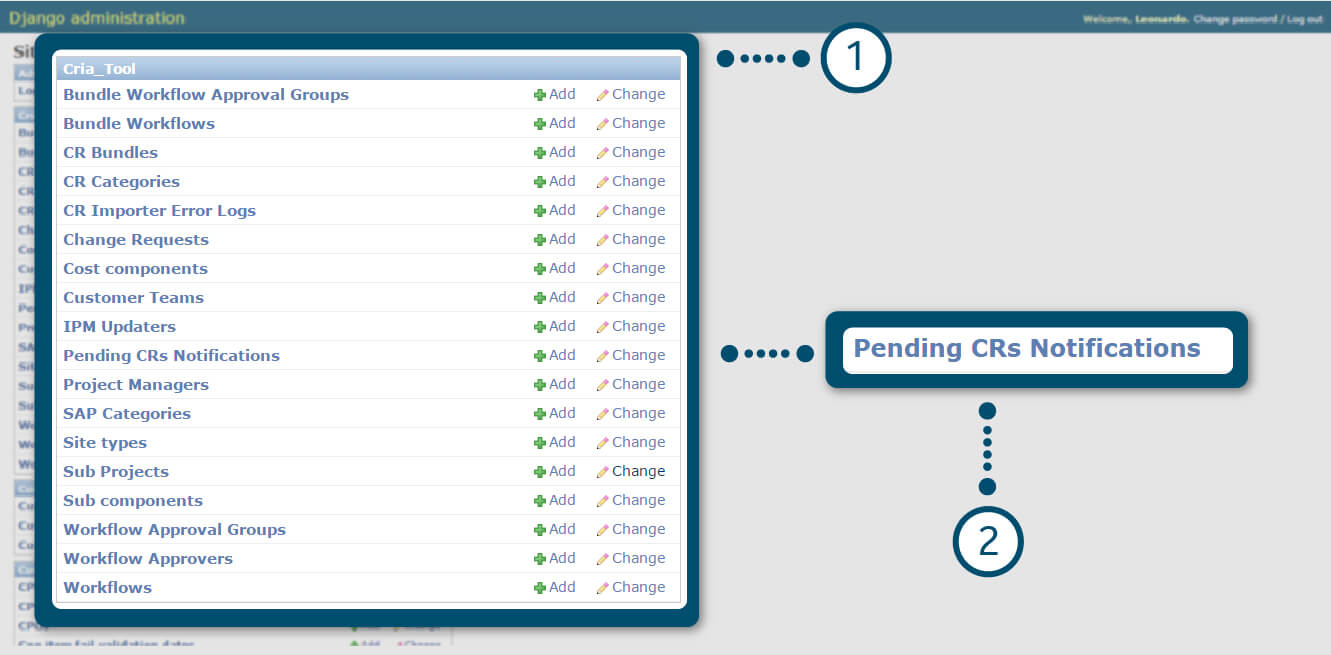
CRIA – Setup Governance emails
1. In CRIA Tool administration menu.
2. Click on “Pending CRs Notifications” link.
Important: This procedure will define who, and what periodicity, should be informed when a CR approval request is pending for more than X days. The tool is already configured to have CT-CM, CBT CM and CM Head receiving governance emails.
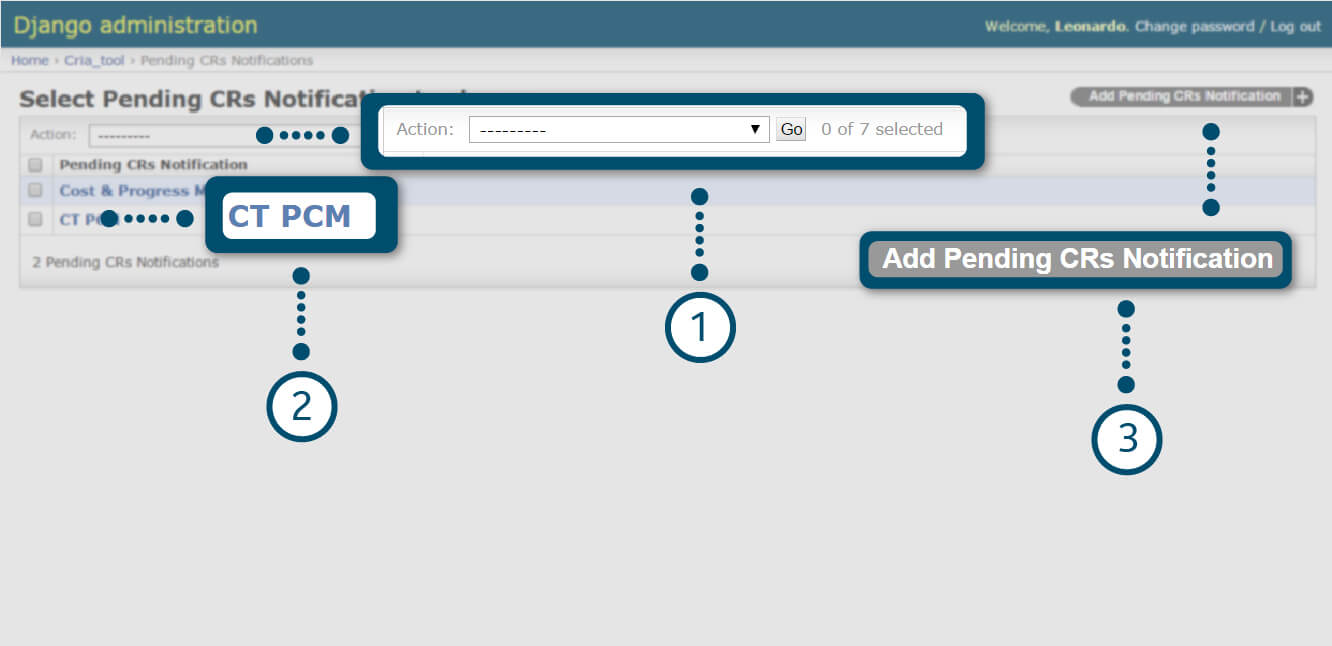
CRIA – Setup Governance emails
1. You can delete any Pending CRs notification with the “Action” option.
2. It is possible to change configuration settings of an already defined warning group.
3. It is possible to create a new group to receive warning emails.
CRIA – Setup Governance emails
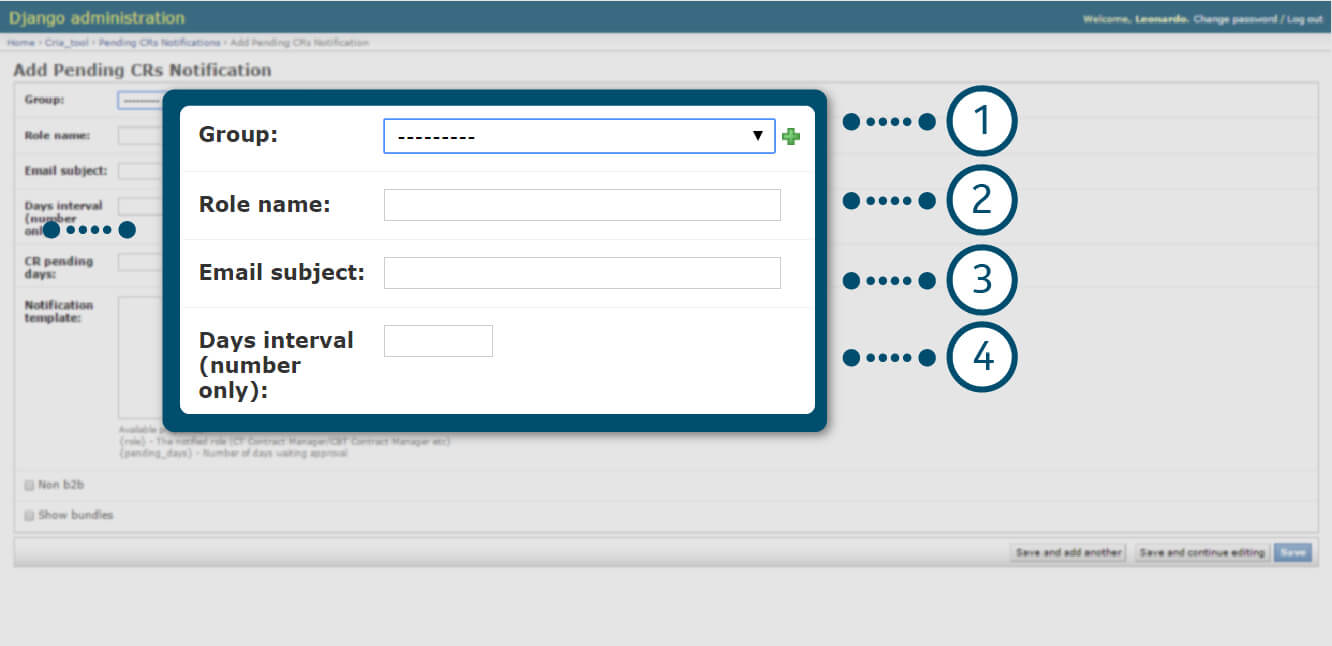
1. Pickup a group from a pre-defined list.
2. Identify the role/responsibilities of the group.
3. Define email subject.
4. Define the elapsed time (in days) that this group will receive warning email.
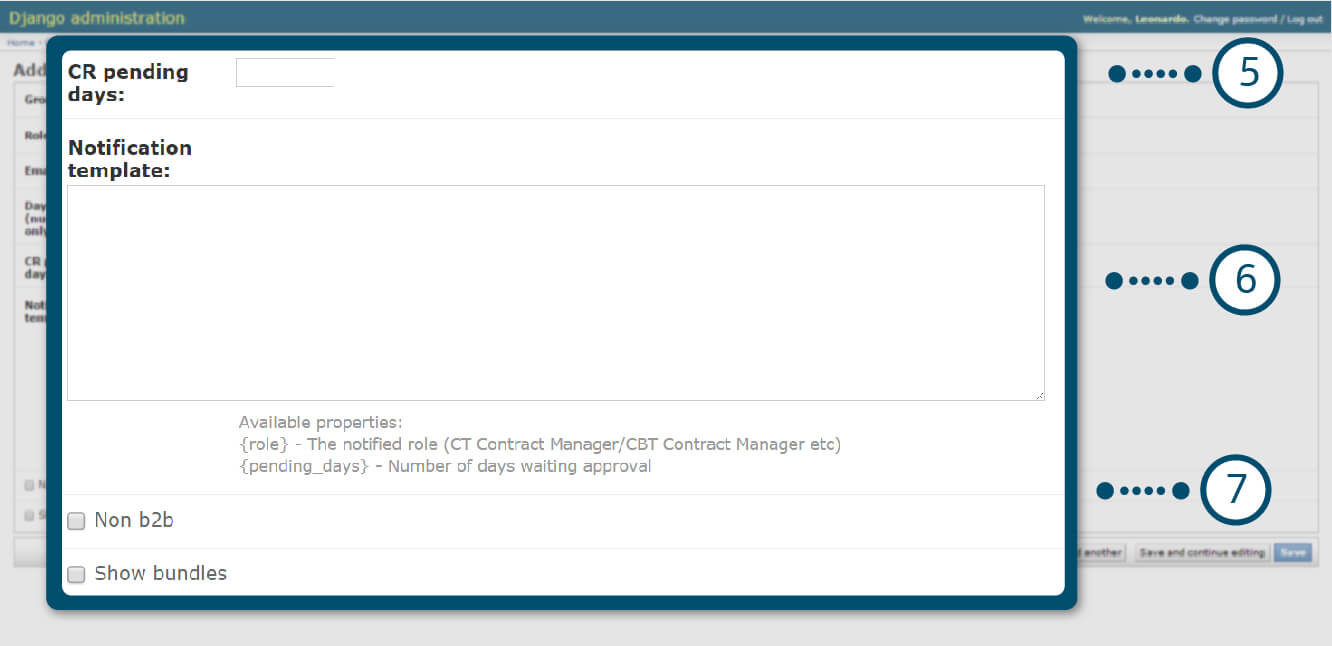
CRIA – Setup Governance emails
5. Define the pending time minimum to start the first warning email.
6. Complete the Notification template comment box.
7. Check NonB2B and Show bundles if their options are necessary.

CRIA – Setup Governance emails
8. Select the best alternative for saving.
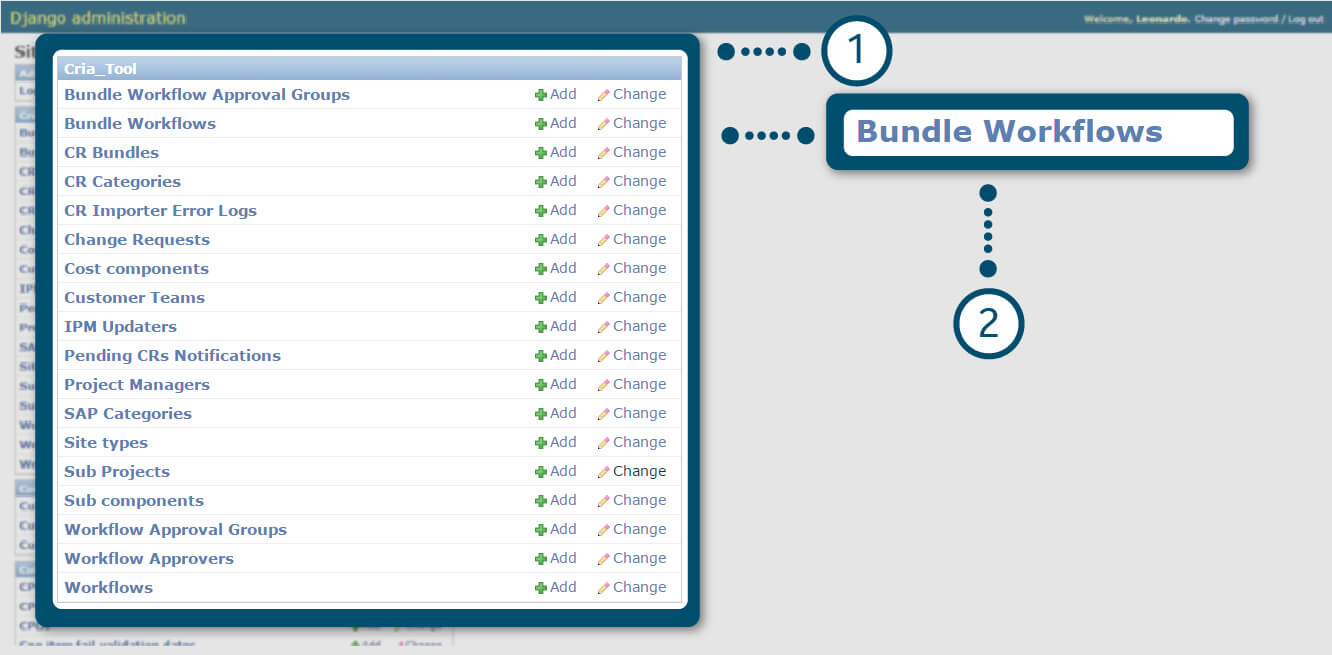
CRIA – Create a new Bundle Workflow
1. In CRIA Tool administration menu.
2. Click on “Bundle Workflow” link.
CRIA – Create a new Bundle Workflow
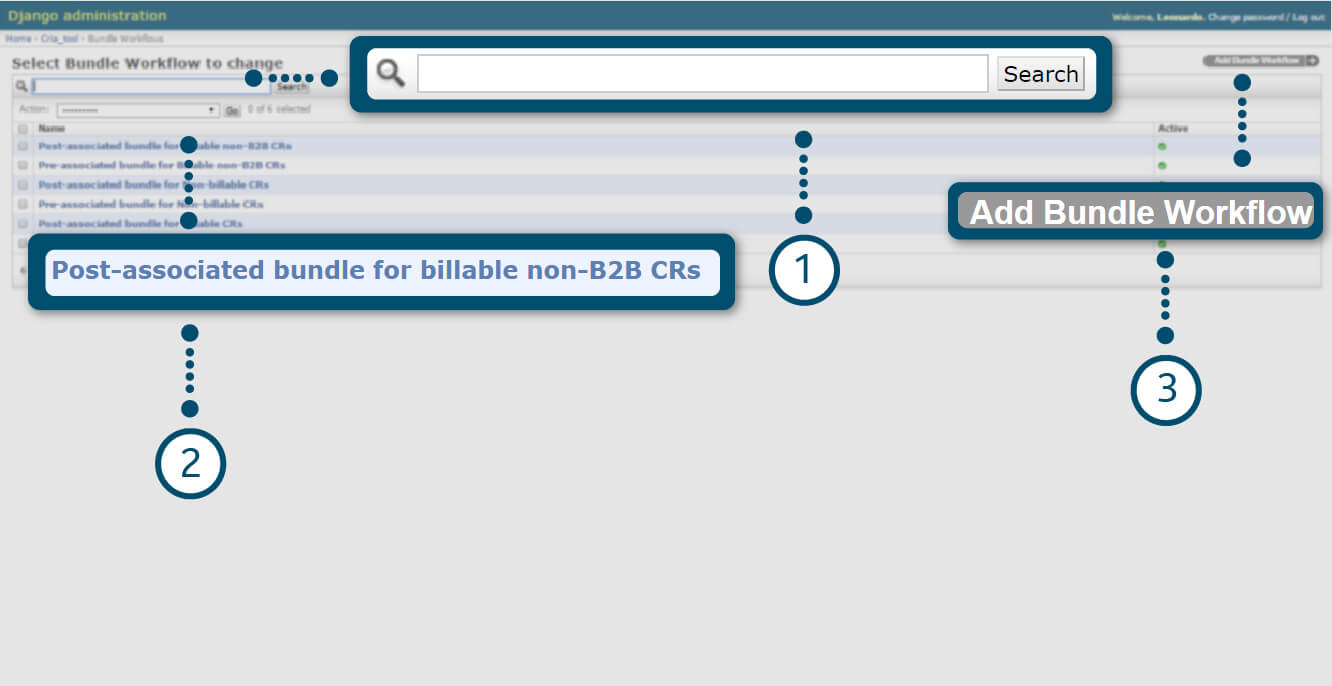
1. You can search for a Bundle Workflow.
2. You can click on an existent group to modify its definitions. There are 6 different flow already defined for pre-associated and post-associated bundles, depending on the nature of the CR’s that will belong to the bundle. Bundle feature in CRIA assumes that all CRs in a bundle have the same CR SAP Category.
3. Click on “Add Bundle Workflow” to create a new.

CRIA – Create a new Bundle Workflow
You can change an existent bundle workflow or create a new one.
1. Edit bundle name.
2. Checkbox to activate workflow (you can create as many inactive flows, but only one active pre and post per kind of CR workflow type)
3. Select workflow type. (business case type)
4. Select bundle type.
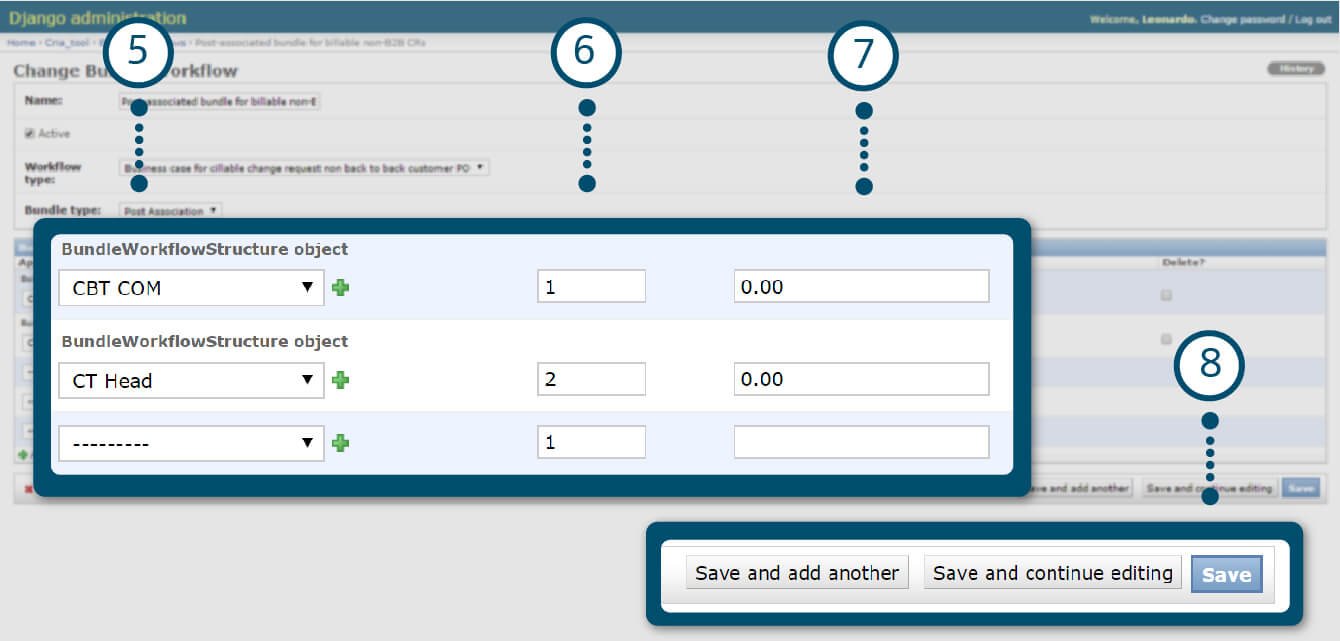
CRIA – Create a new Bundle Workflow
5. Indicate approval group for the approval chain.
6. Indicate the level of approval in the chain sequence.
7. Indicate the minimum amount of cost this approval group must be involved in.
8. Select the best alternative for saving.
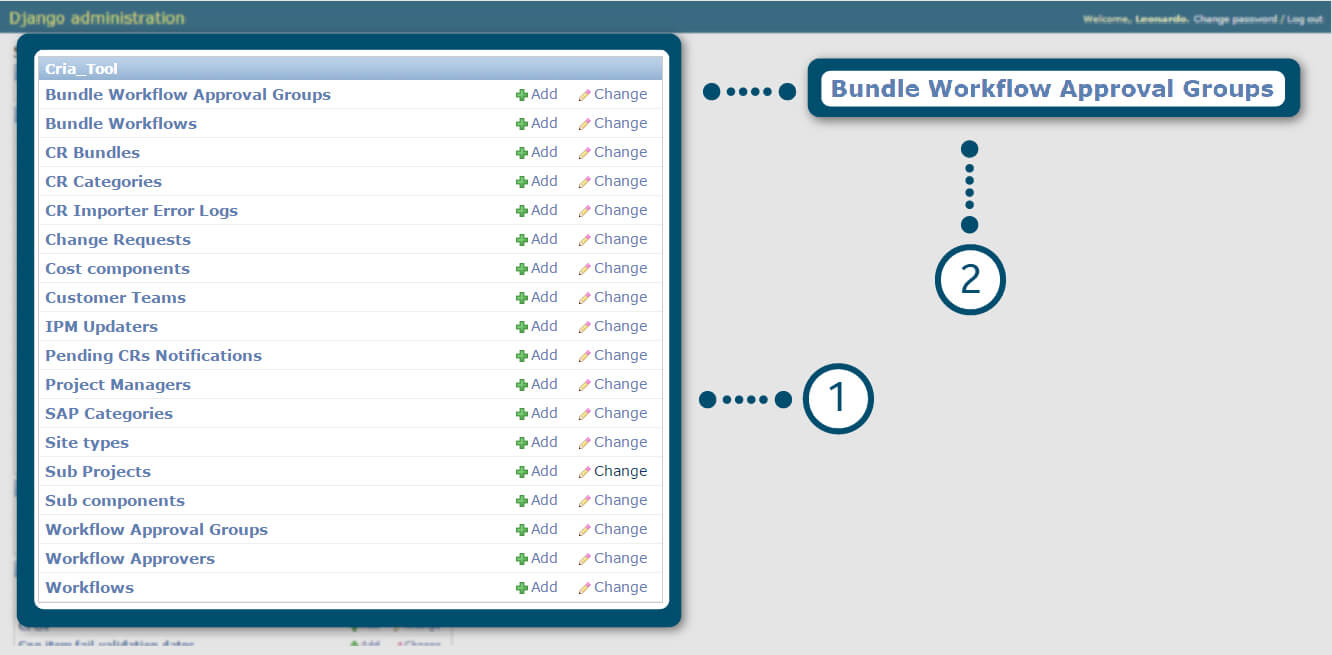
CRIA – Create a new Bundle Workflow Approval Group
1. In CRIA Tool administration menu.
2. Click on “Bundle Workflow Approval Groups” link.
The further steps for groups creation are totally similar to the sequence presented in slides 24, 25 and 26.
SoR for CRIA tool users