ZINA: Create Change Request SPO CRIA
by ZINATeamZINA Workflow Management: CRIA - Create Change Request SPO

CR workflow using IPM and CRIA.
• CRIA stands for Change Request Innovative Automation. It’s a tool developed by Business Operations team for Latin America.
• CRIA tool aims to allow automation in the approval chain for Change Requests and centralize the database with information associated with these CRs.
• CRIA acts in the process of Change Requests approval. It is still needed and mandatory the usage of IPM for all other processes associated with CRs.
• This document describes the operational procedures for end users to import CR data from IPM and the benefits of the CRIA tool usage.


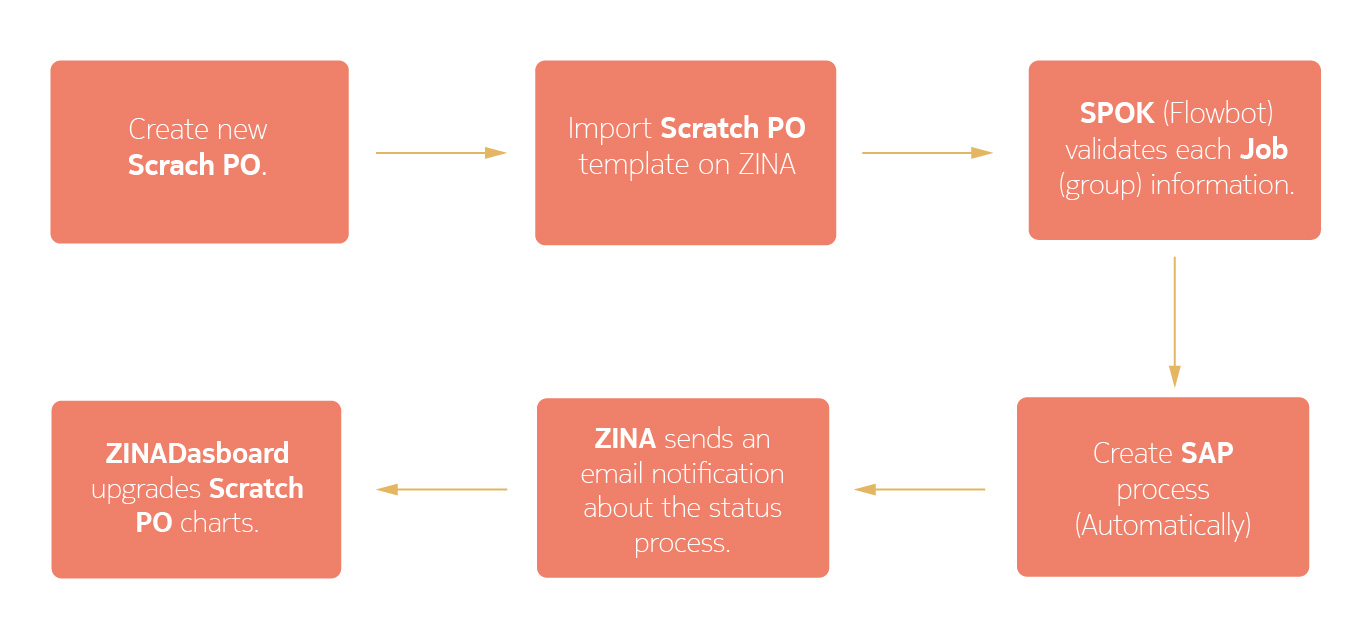
Scratch PO workflow using SPOK and SAP
ZINA is automating the creation of Scratch Purchase Orders –
• Allows a better control over Scratch PO for subcontractors creation.
• Reduces time from an average of 3 days to around 10 minutes.
• Saves costs associated with the creation of this process in SAP. (without human interaction)
• The process is totally automated.
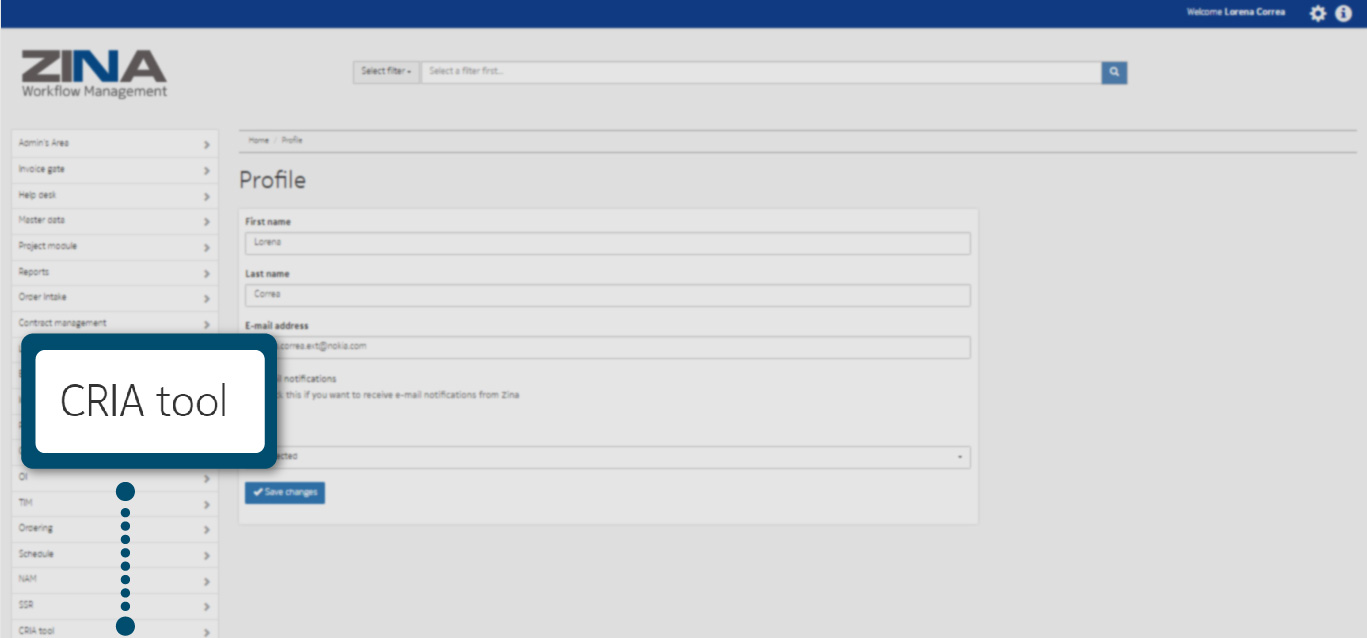
In the side menu, display the “CRIA Tool" options.
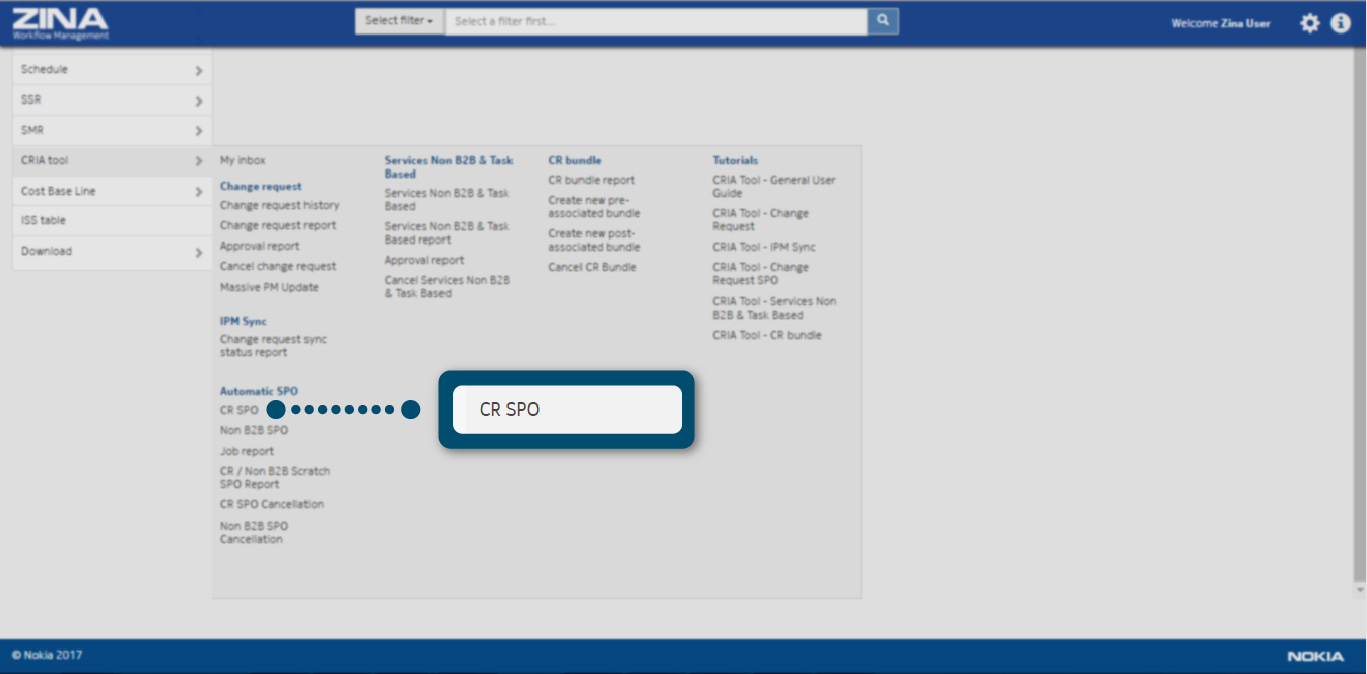
Select the “CR SPO" option as the image indicates.
To create a new item "Scratch PO for Change Request“:
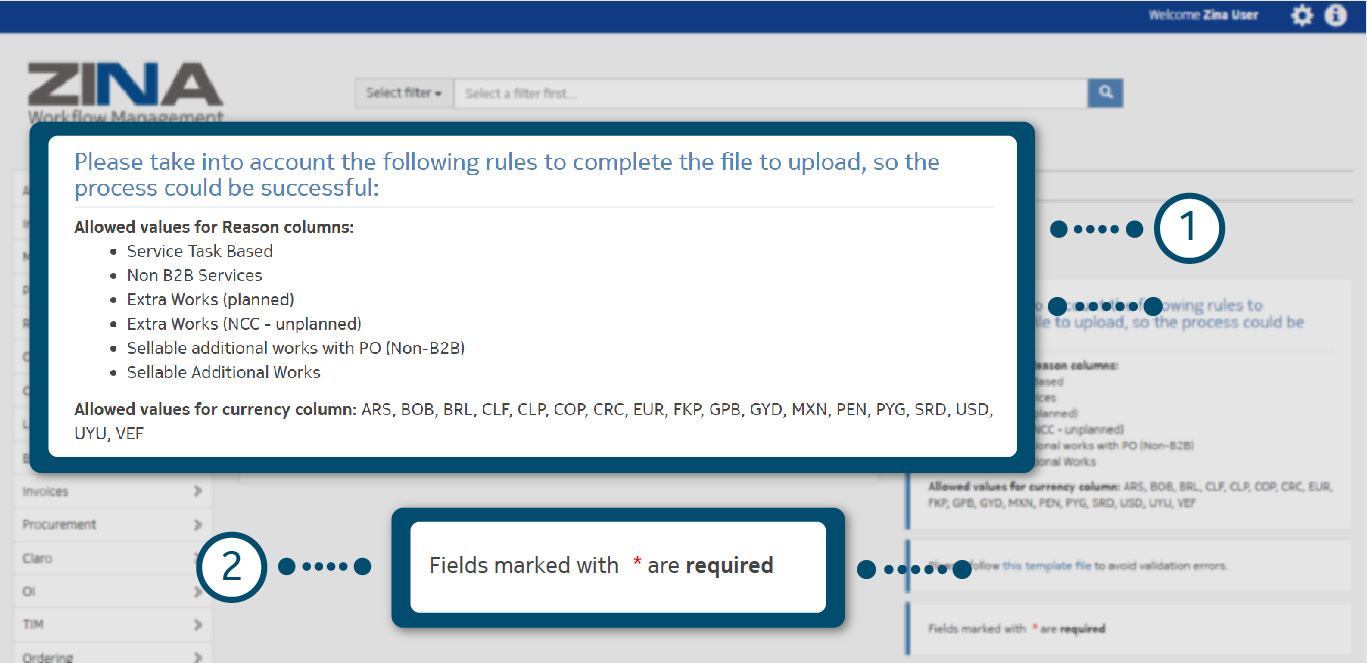
1. Read the instructions to fill the CR SPO file.
2. Download the example template in .xls format.

Once you download the sample template in .xls format, complete the first “SVO
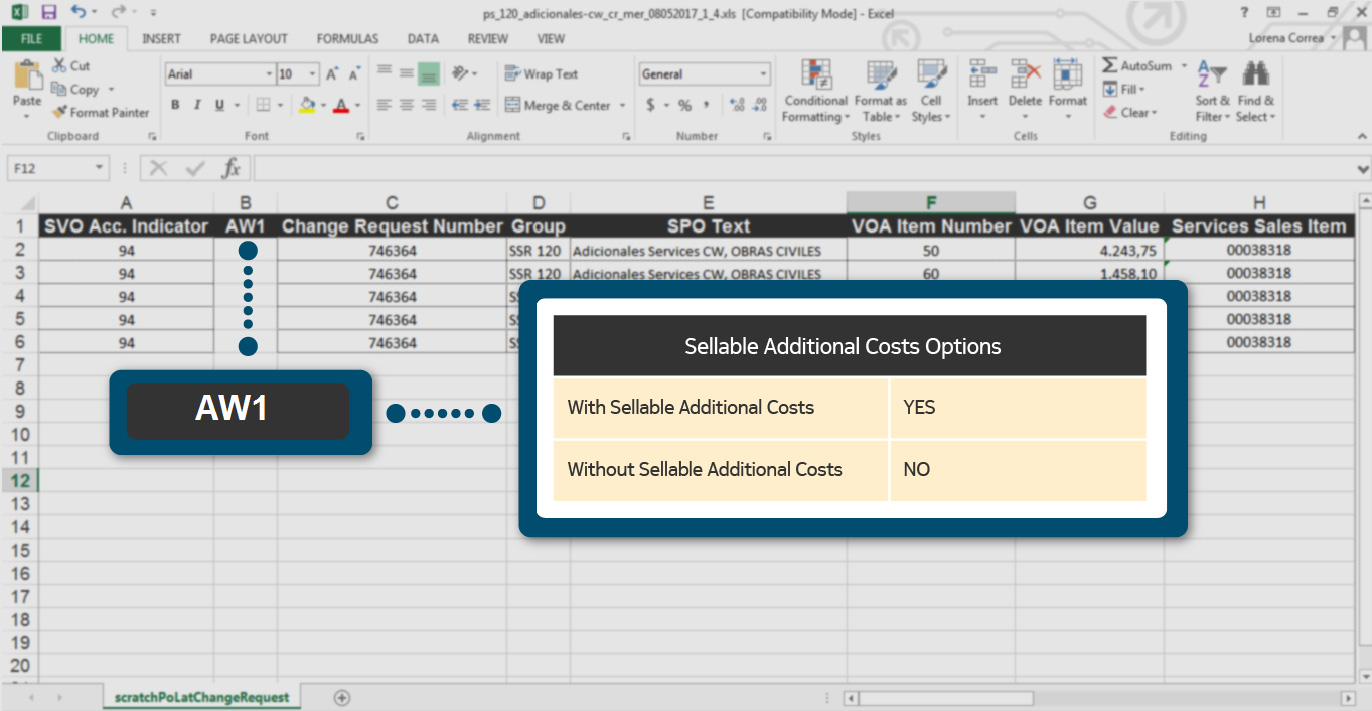
To complete the second column “AW1" in the .xls document, write the word "YES" in the field if the sale has an additional cost or "NO" if the sale has not additional cost.
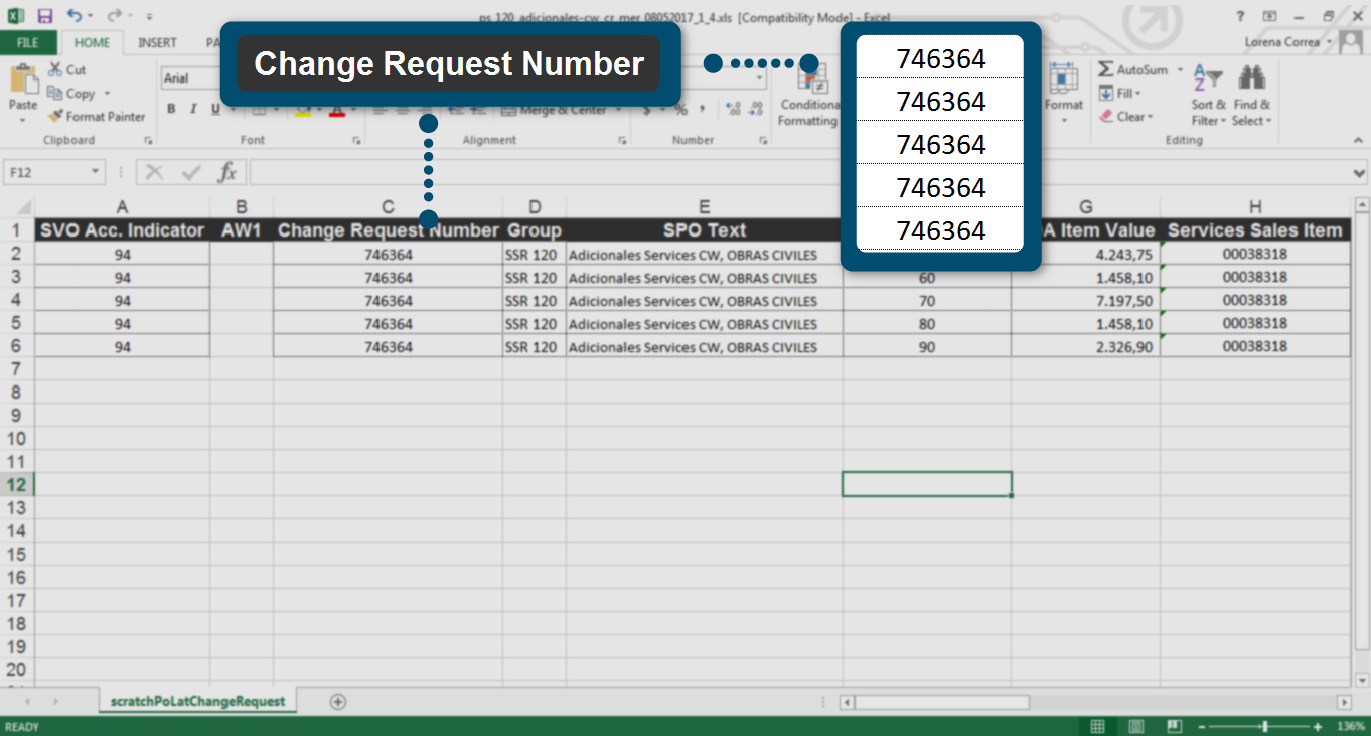
In "Change Request Number“ column complete the "Change Request (CR) ID" that corresponds to the number of "item list" set in the .xls document.
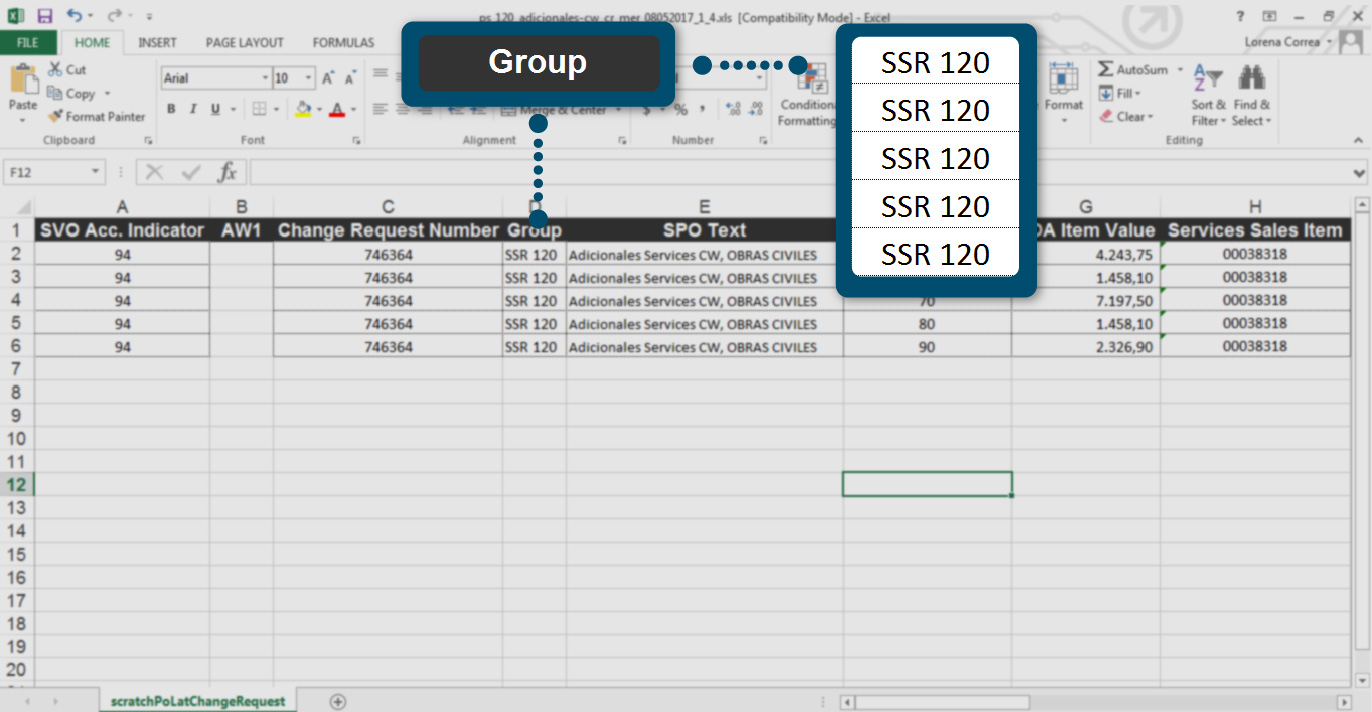
In “Group" column, define the corresponding group for each change request ID.
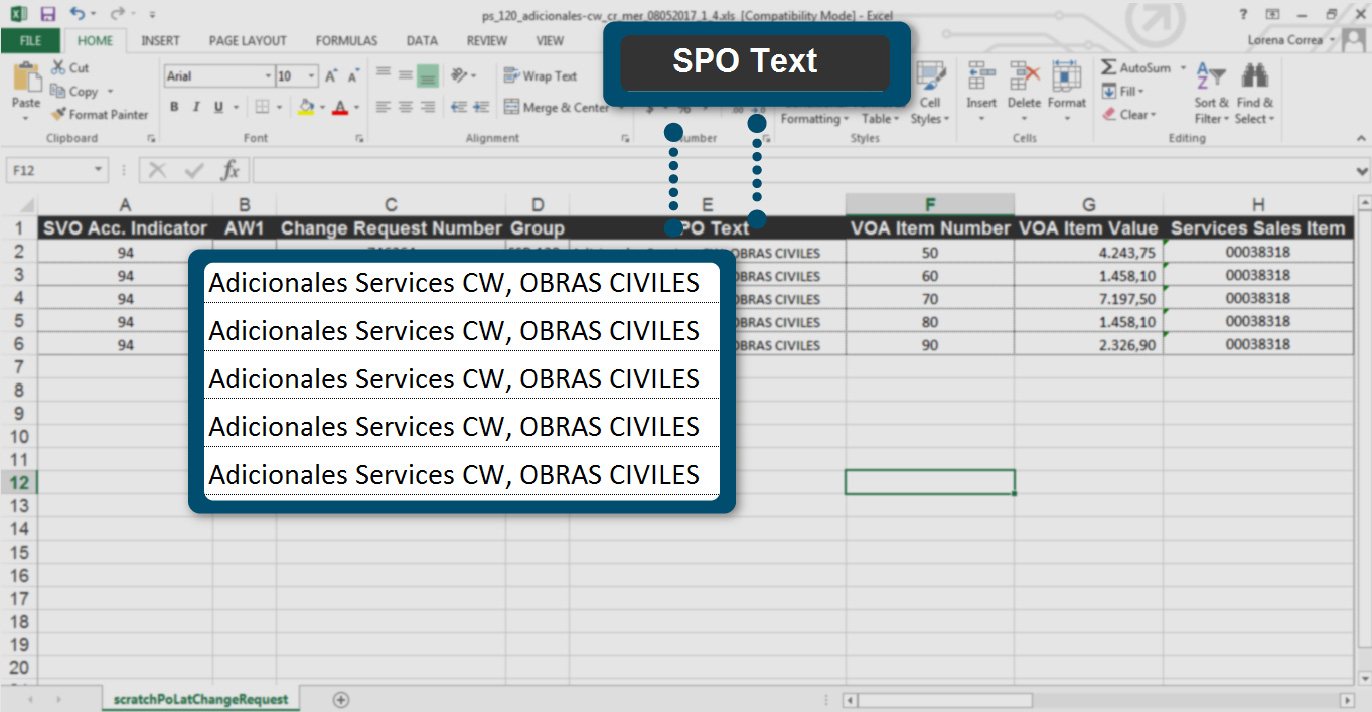
Complete “SPO Text” column, as the image shows.
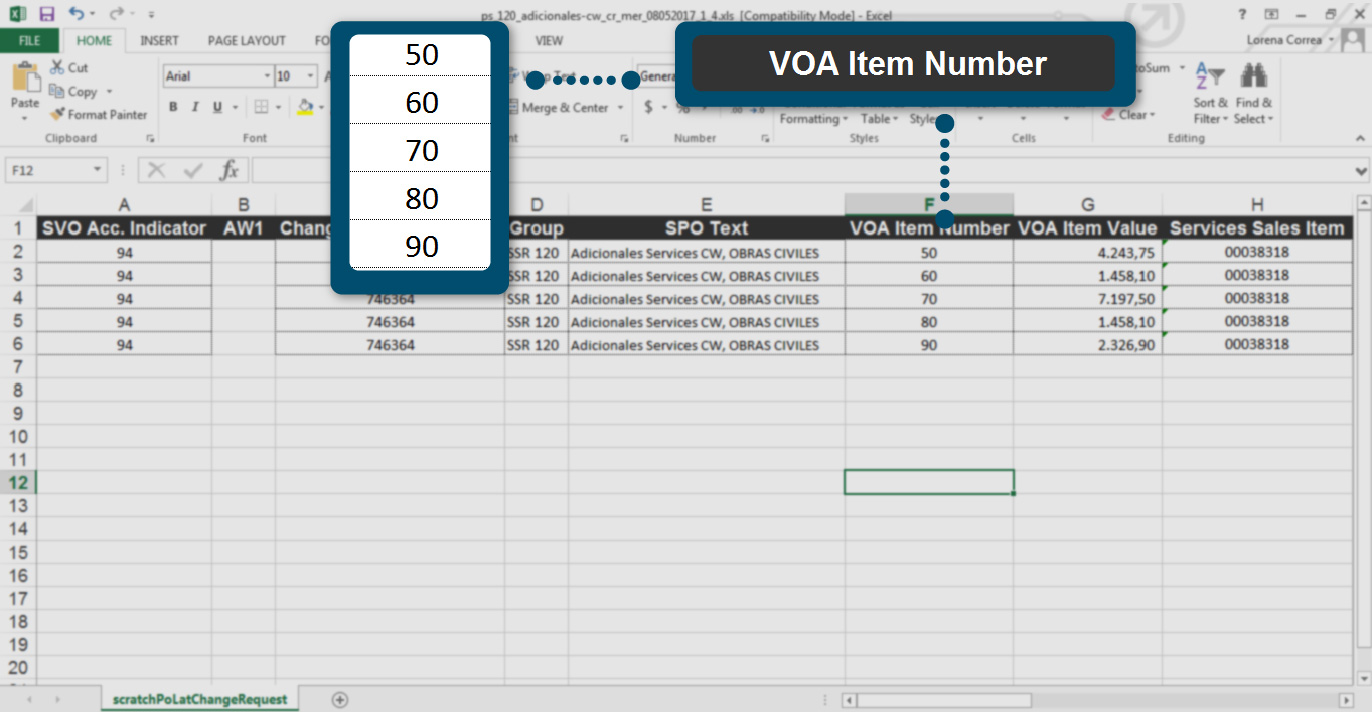
Complete “VOA Item Number” column, enter the number of "Sales item" within the VOA that corresponds to each group, according to the image.
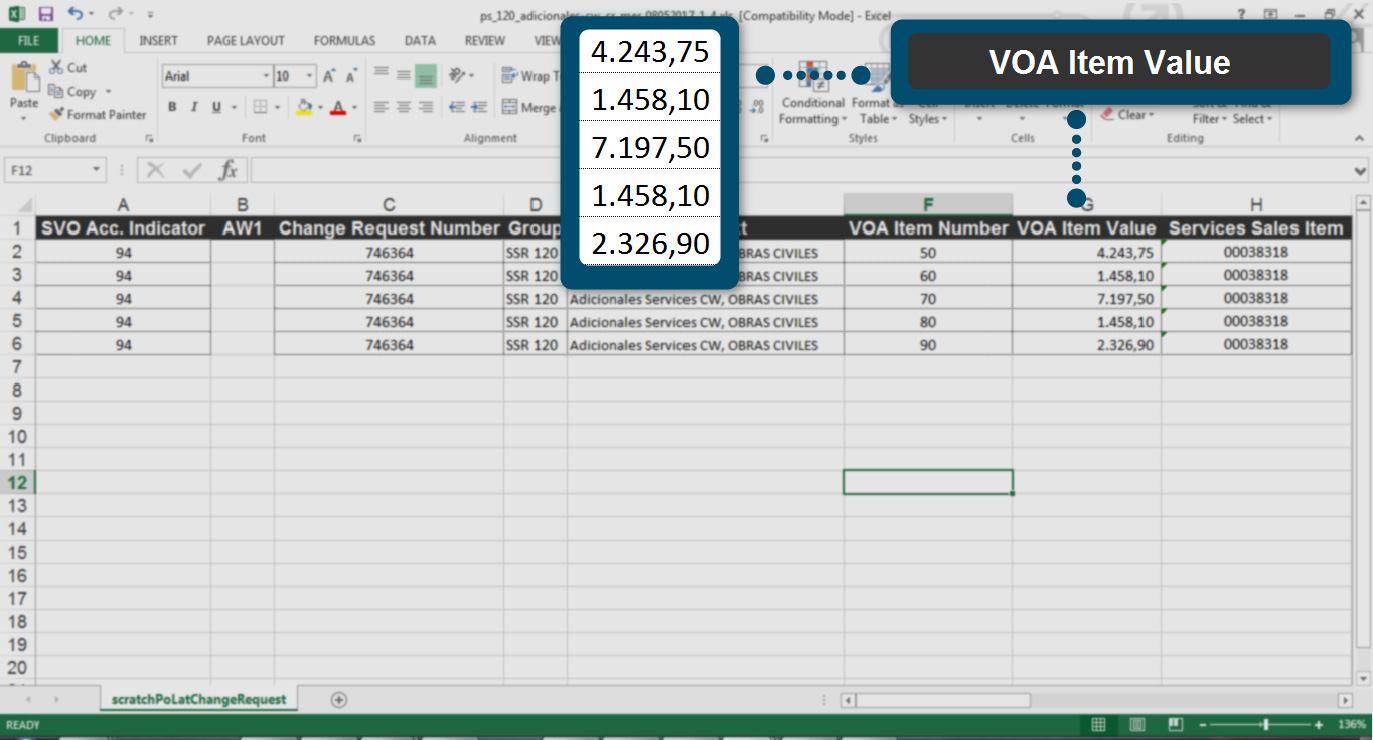
Complete “VOA Item Value” column with the respective VOA sales item price. The number format must be commas separating the decimals and without points separating the thousands, as the image shows.
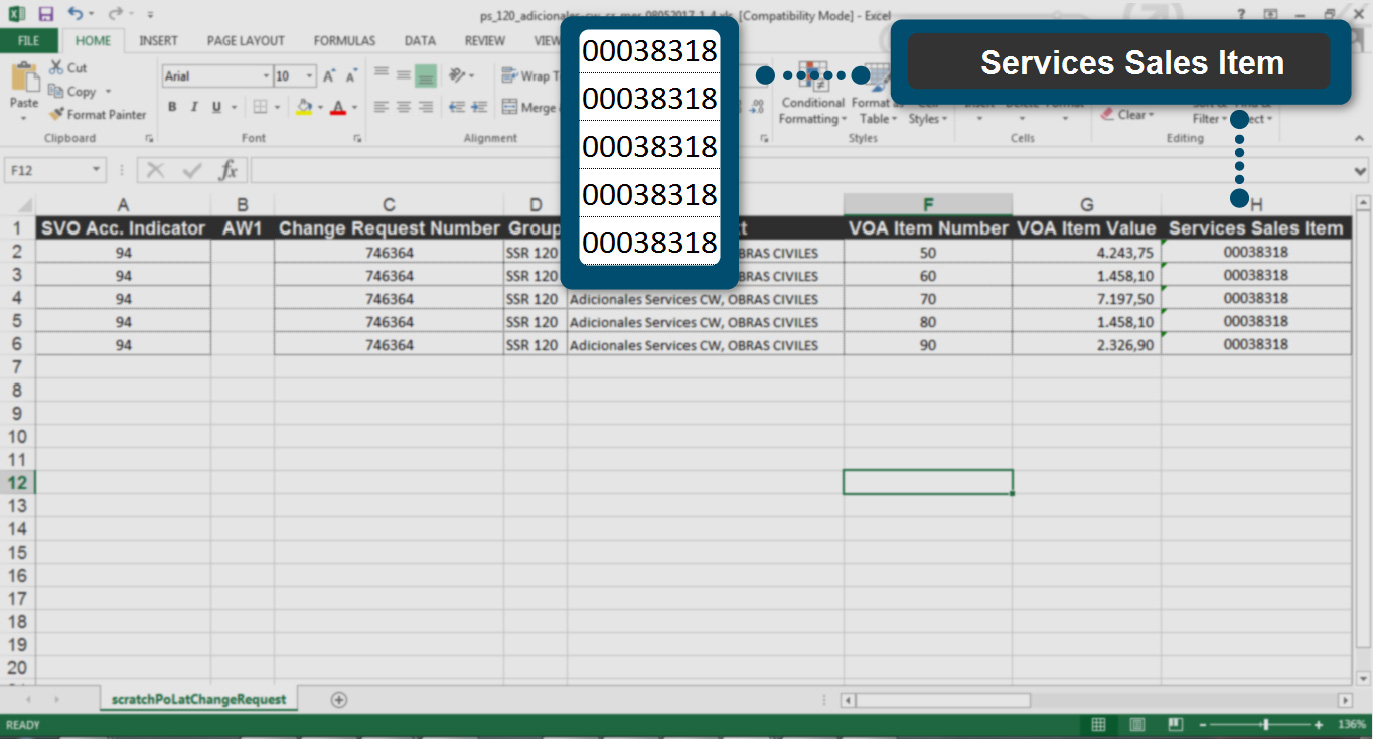
Complete “Services Sales Item” column, type the code that is before the name of "Sales Item".

Complete “VOA Item Quantity” column with the estimated amount for each item. The number format must be commas separating the decimals and without points.
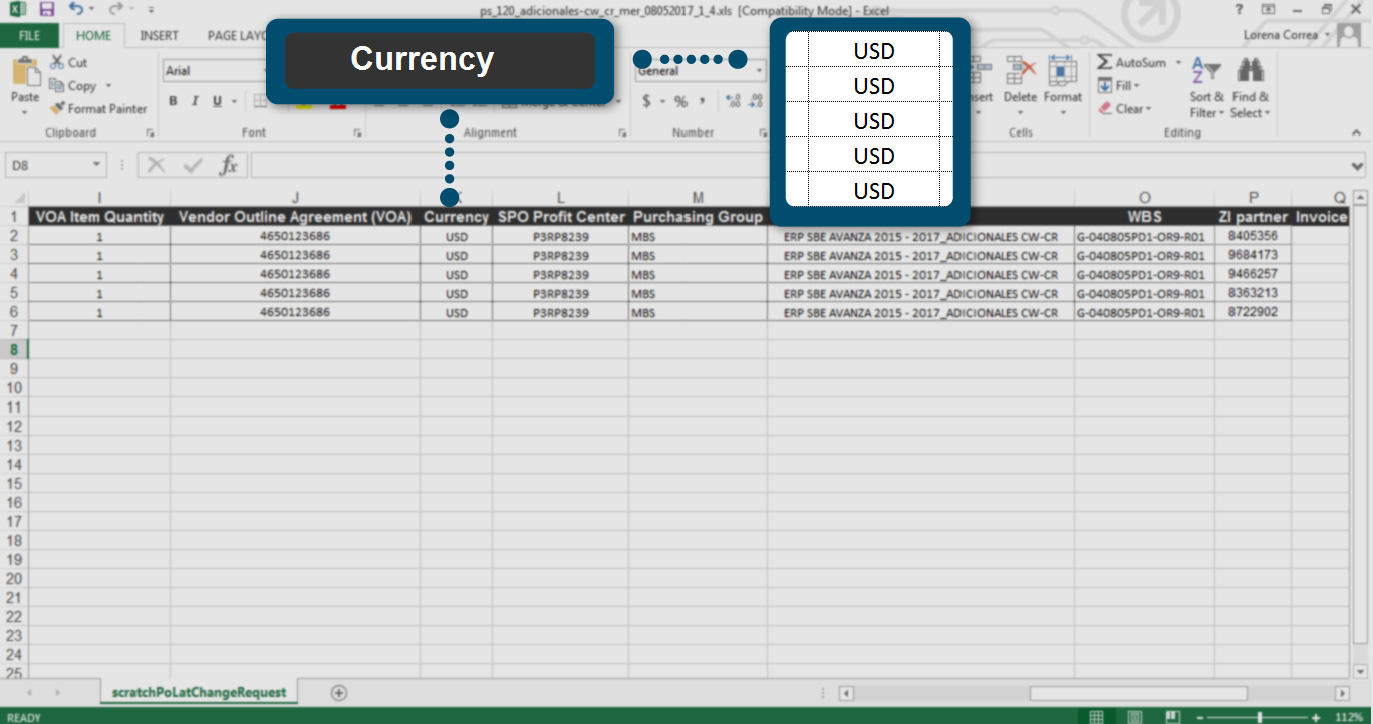
Complete “Currency” column. (Allowed values for currency column: ARS, BOB, BRL, CLF, CLP, COP, CRC, EUR, FKP, GPB, GYD, MXN, PEN, PYG, SRD, USD, UYU, VEF)
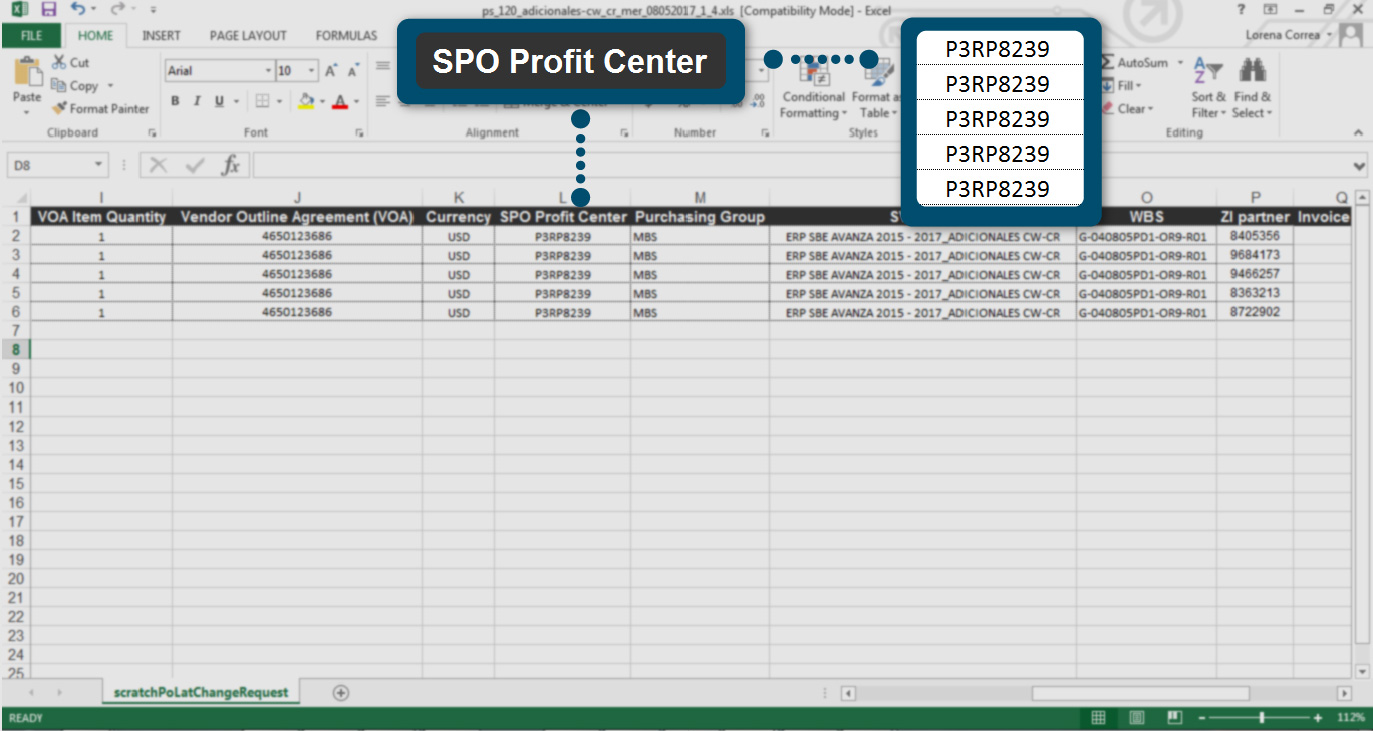
The “SPO Profit Center" column is optional.
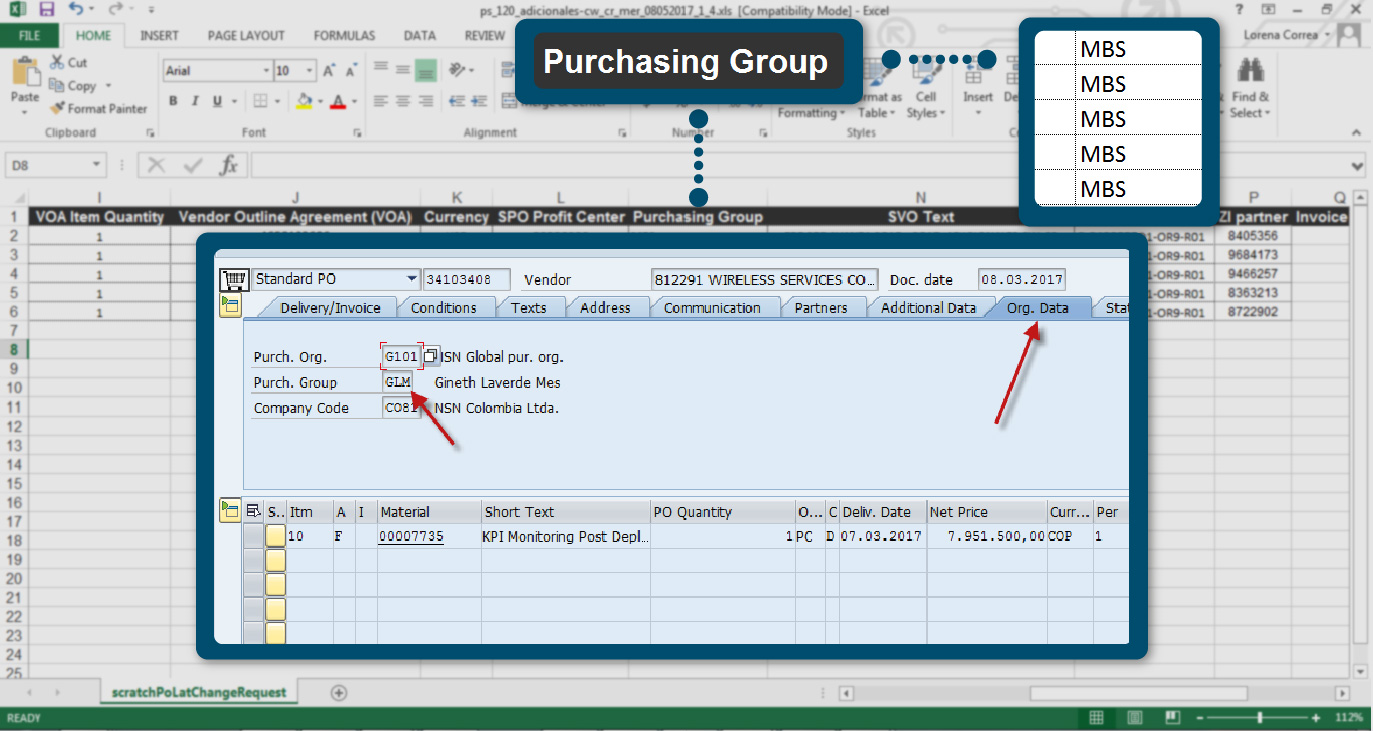
As the image indicates, complete “Purchasing Group" column, if you do not have one, you can load with ZAK.
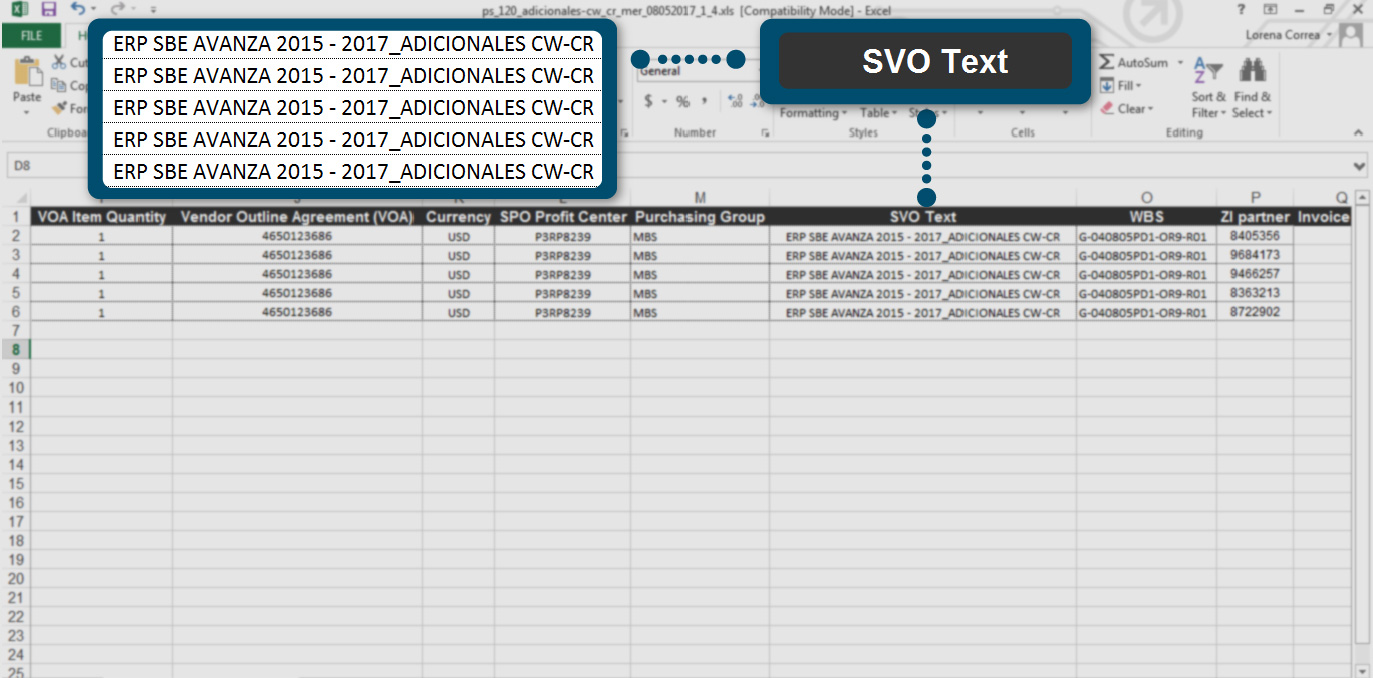
Type the corresponding information in “SVO Text" column.
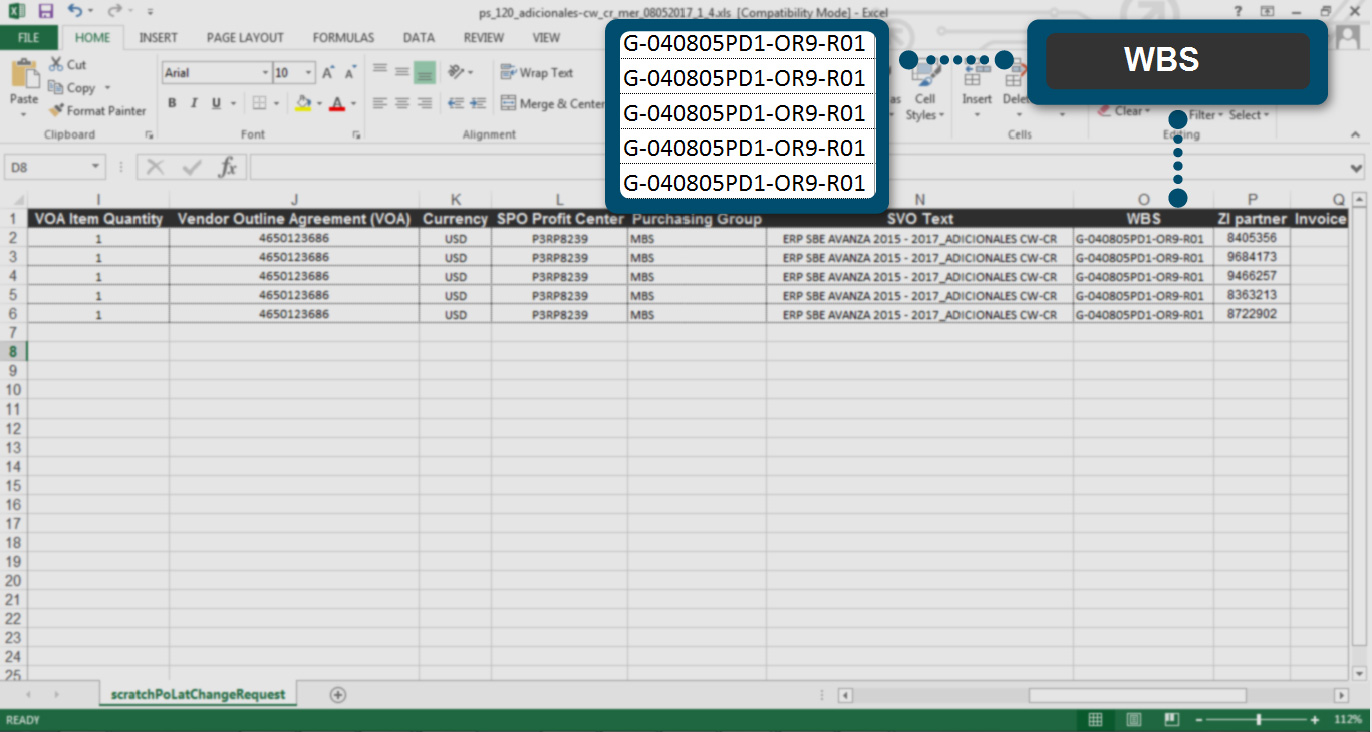
The WBS information from SAP and complete the "WBS" column. Use a 4th Level WBS (ex: Telecom Personal) or a 3rd Level WBS (ex: CLARO Colombia). Both are valid data entries.
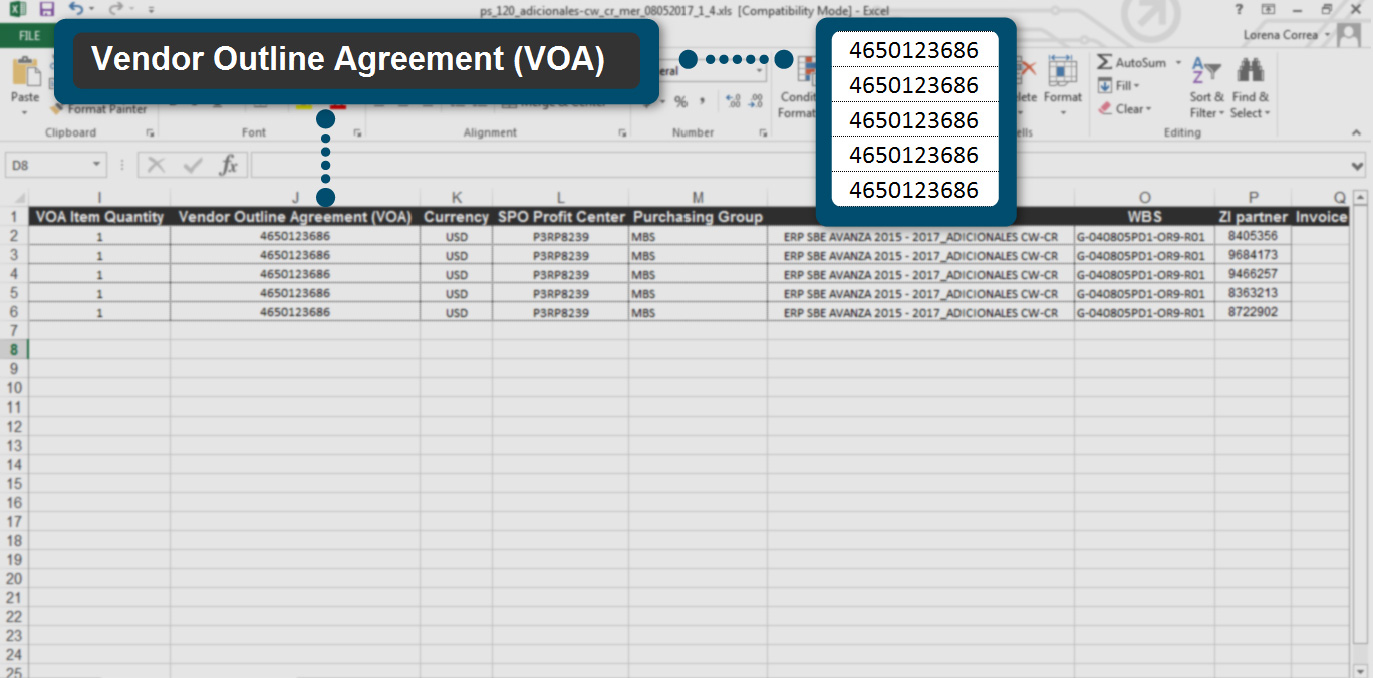
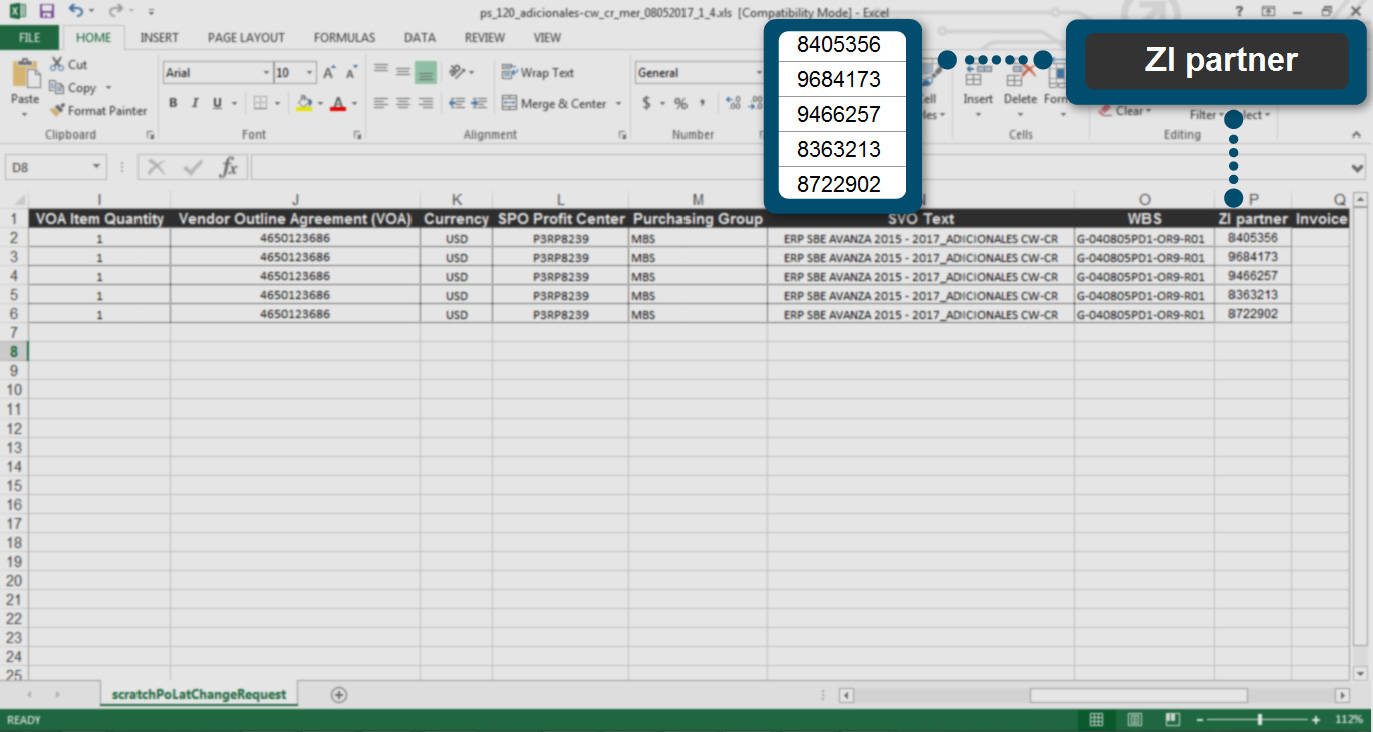
Complete the “ZI partner" column. As the image shows.
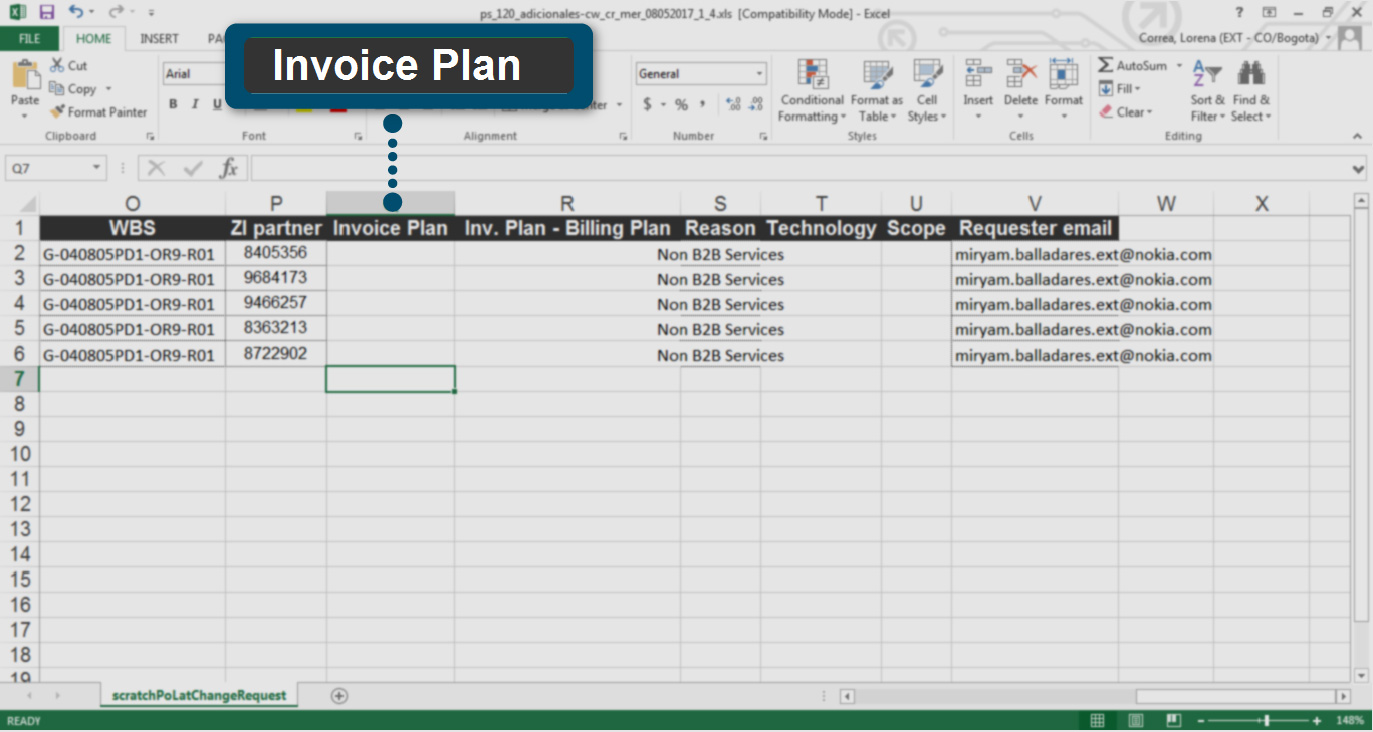
The “Invoice Plan" column is optional.
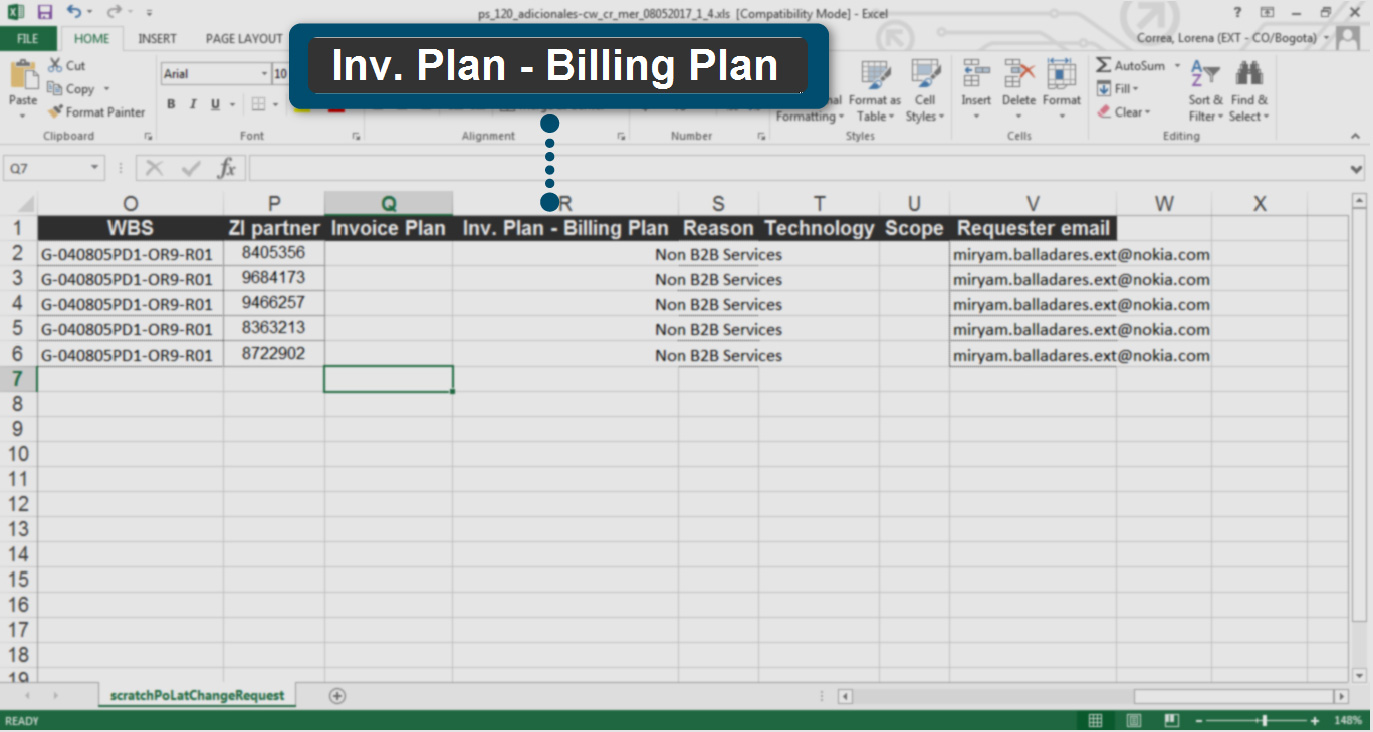
The “Invoice Plan – Billing Plan" column is optional. As the image indicates.
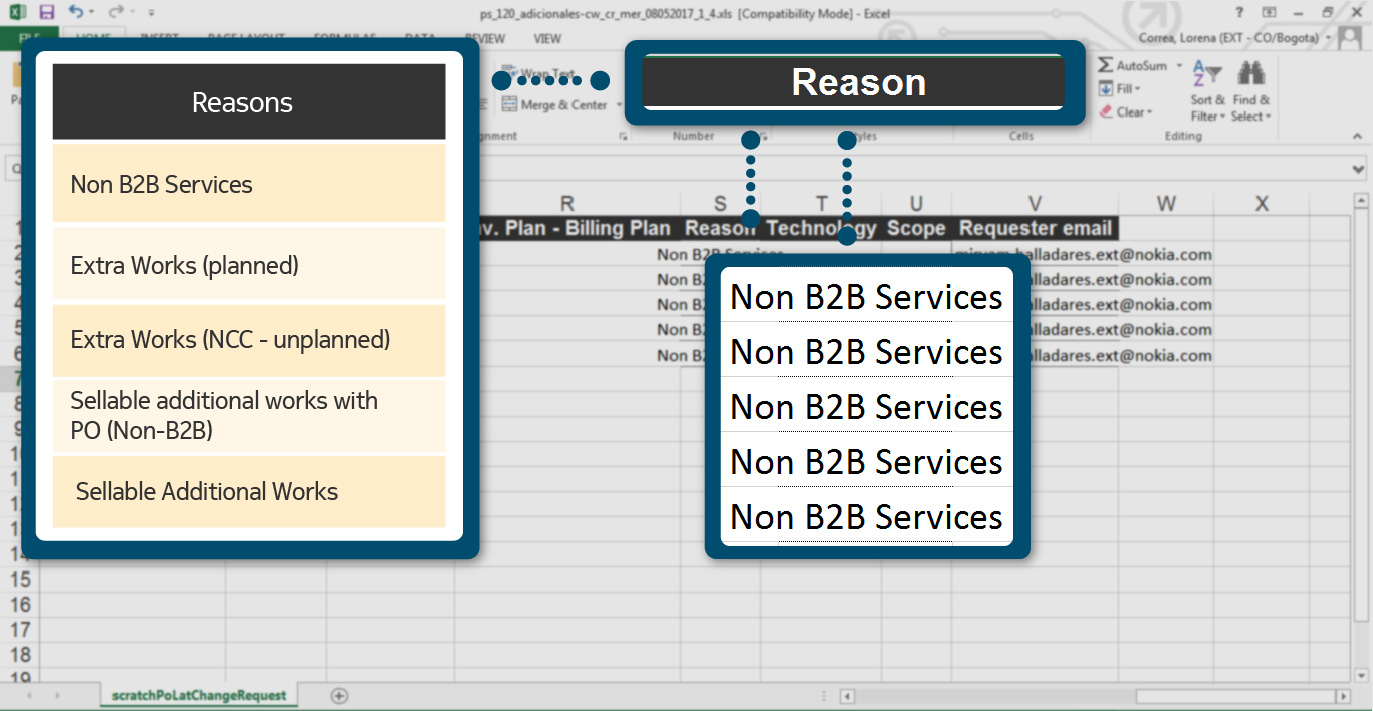
The "Reason" column must be completed with the information corresponding to the table, as indicated by the image.
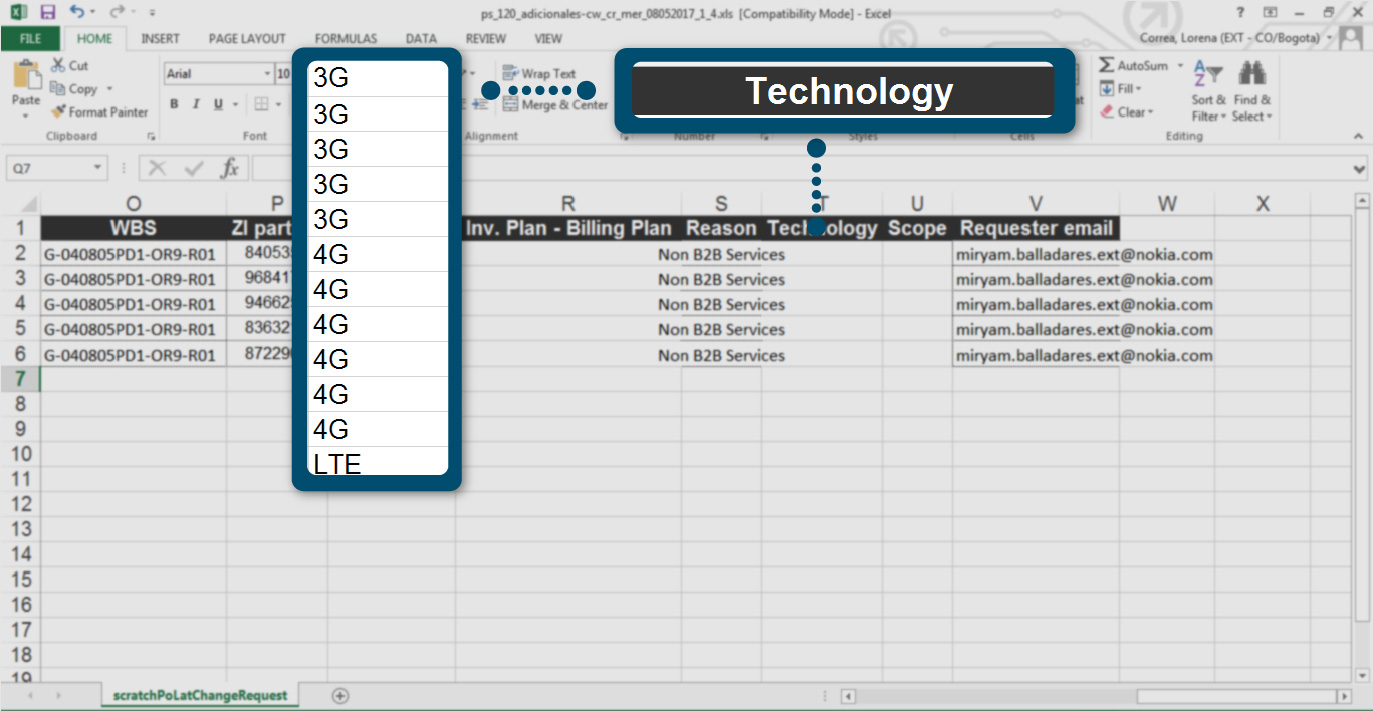
Describe in the column "Technology" the technical specification of the order.
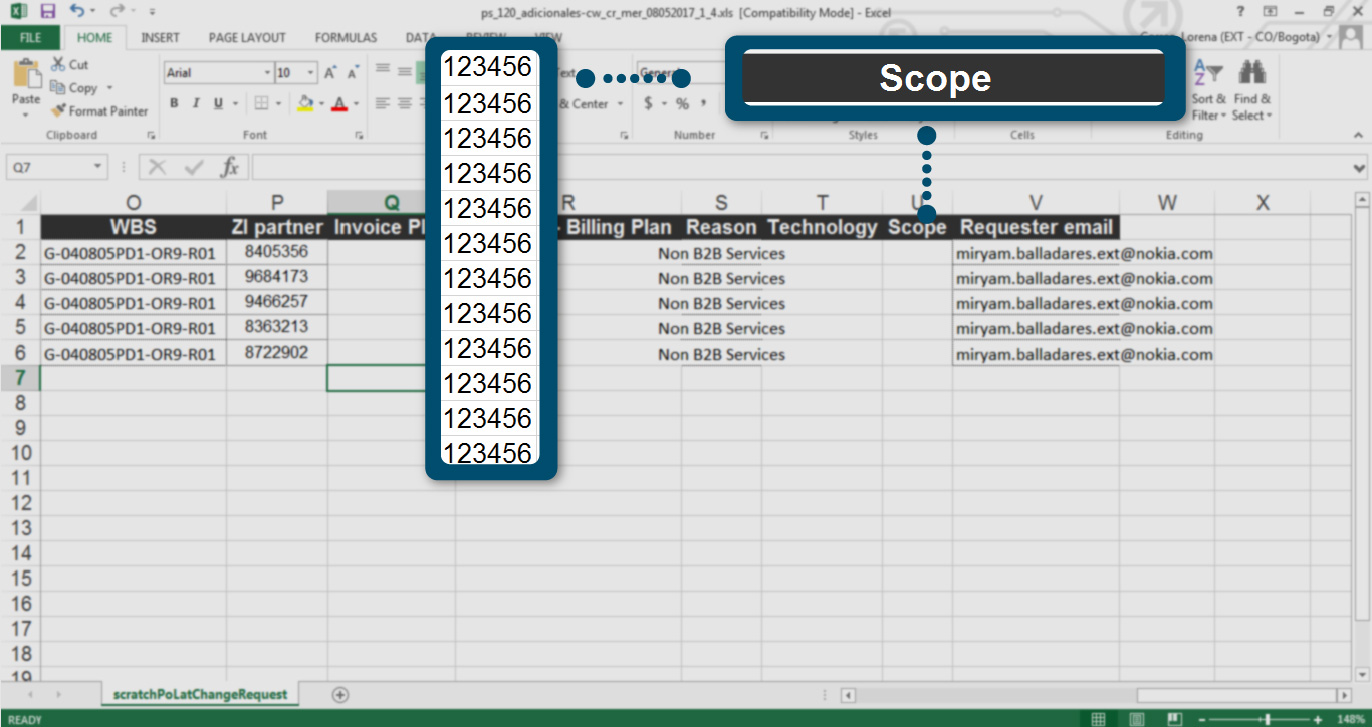
Complete the "Scope" column with the corresponding information.
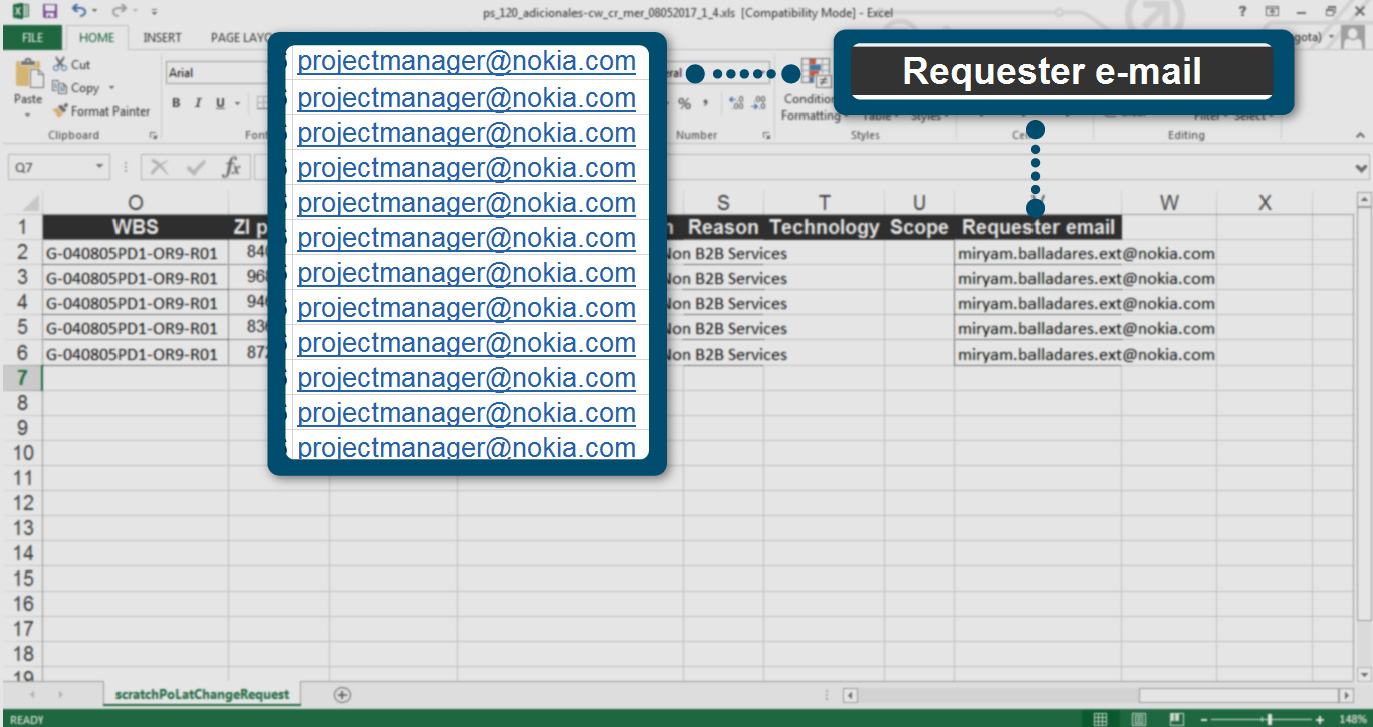
In the "Requester e-mail" column, enter the corporate email (@ Nokia.com) of the Project manager that supervises and approves the import of the new Scratch PO Change Request.
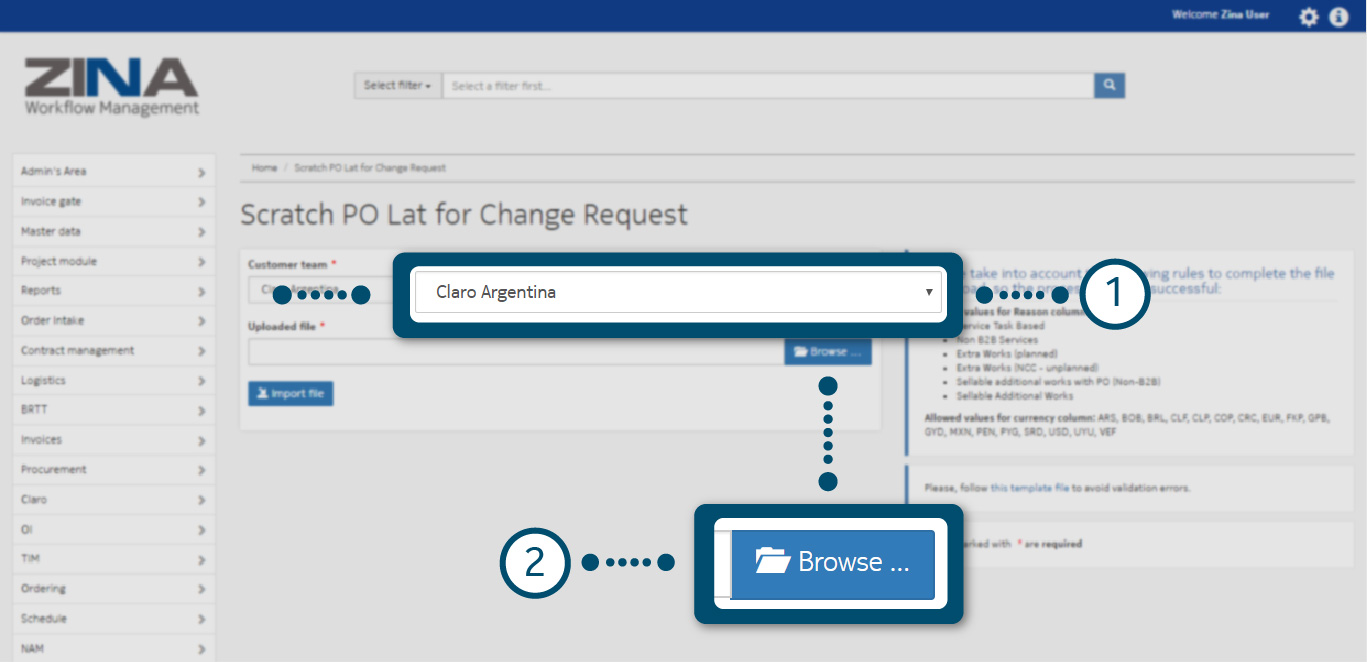
Once you have your .xls document with the required fields complete:
1. Select the customer team.
2. Click on "Browse" button and load the document from your computer.
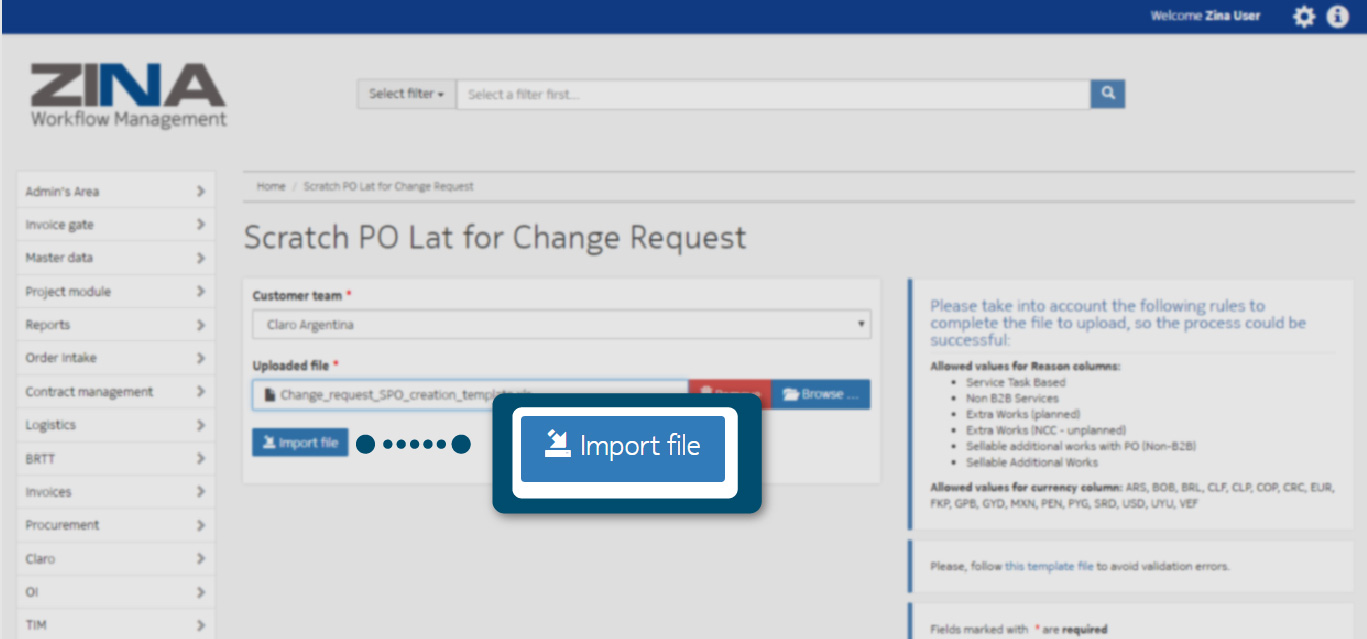
To discard the already uploaded document, click on the red button "Remove" and to modify or upload a new one click on the blue "Browse" option, as shown in the image.

Once you have finished uploading the file, click on the blue "Import file" button, as the following image indicates.
When the importer has finished uploading the files, it shows a summary of validation of errors and cases of success, as the image indicates.
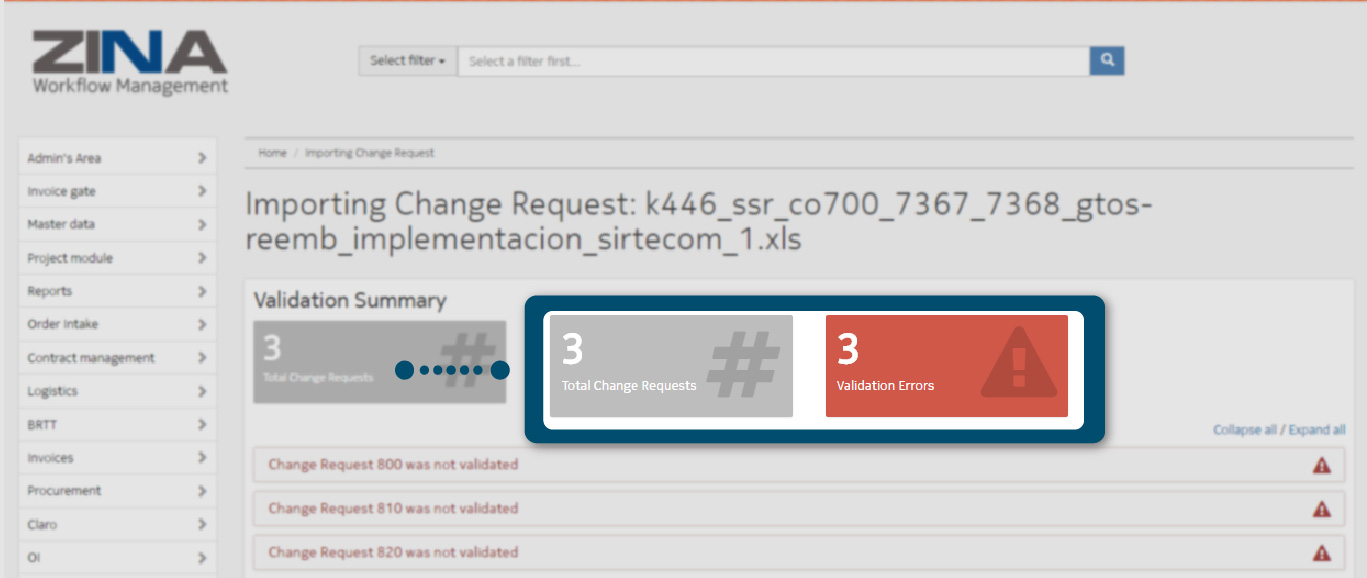
You will find the summary of your import and each of the items that are part of the previously imported .xls document.
1. Display the line error o success cases.
2. Review each item and verify for any bug the importer file.